
Well here we are again, No I haven't forgotten or given up....just been very busy. I didn't think that I could have a larger post than the last but here we go, with a whopping 50 photos for your eyes.
With spring comes new ambitions and lots of work, ohh yeah also rain. The rain is welcome although I can now find all the locations of the leaks throughout the roof. After some torrential downpours I've determined that the issues are located around the hearth and chimney area, in all directions. No fear buckets are here to stop the flood! It just makes me laugh about when I was young, for whatever reason I think of all the shows where there was a young couple sitting in their living room during a storm with buckets set all over the house and they are just listening to all the different tones the drops make into the buckets...not sure where that came from.
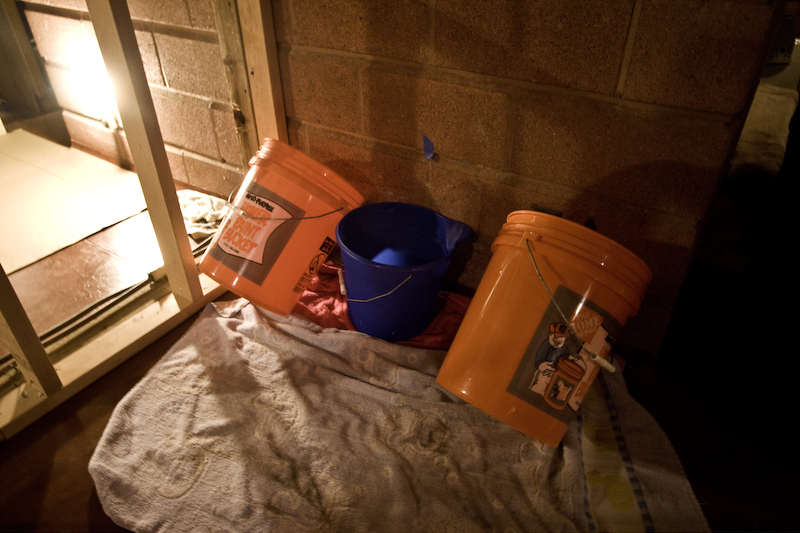 Drip Drop |
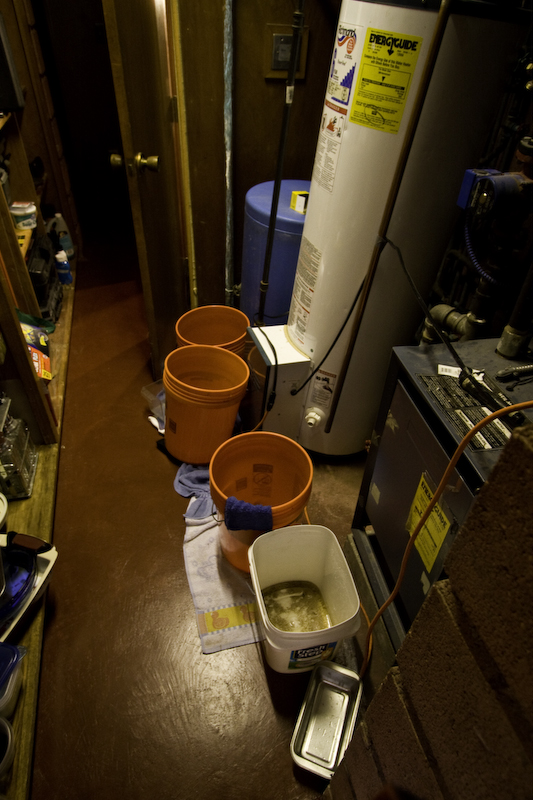 Bucket Row |
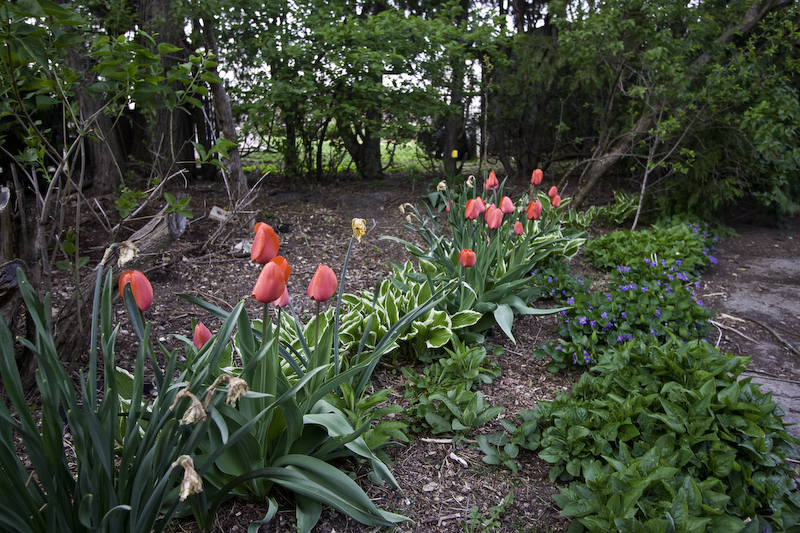
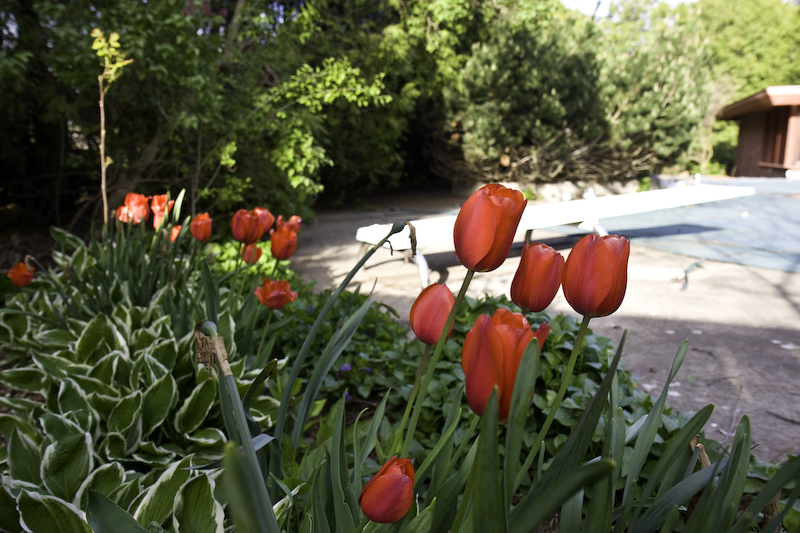
With rain comes yard work and new plants. I've been told that there was plants and flowers all over the lot but I didn't imagine this. After purchasing the house I found some landscape plans, so I had an idea that some work had been done. Tulips, daffodils, wild grasses, ground cover, tons oh hostas, ferns, etc..... It's been fun seeing everything rise from the ground, and I'm sure it's just begun. Summer heat will show new plants I'm sure. Being a new homeowner, I haven't mowed a lawn since my younger days. It's kind of nice to mow again, especially my own lawn, although I'm sure that will change after a while.
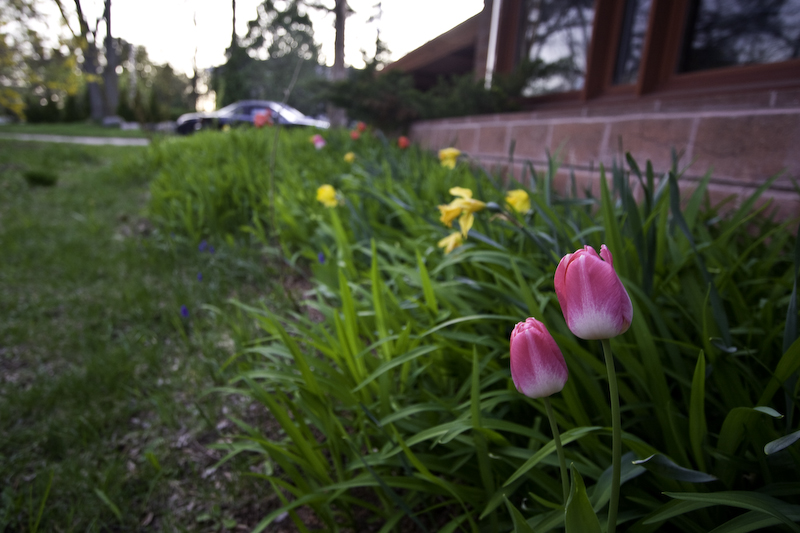 All colors of tulips |
 Flowering Tree |
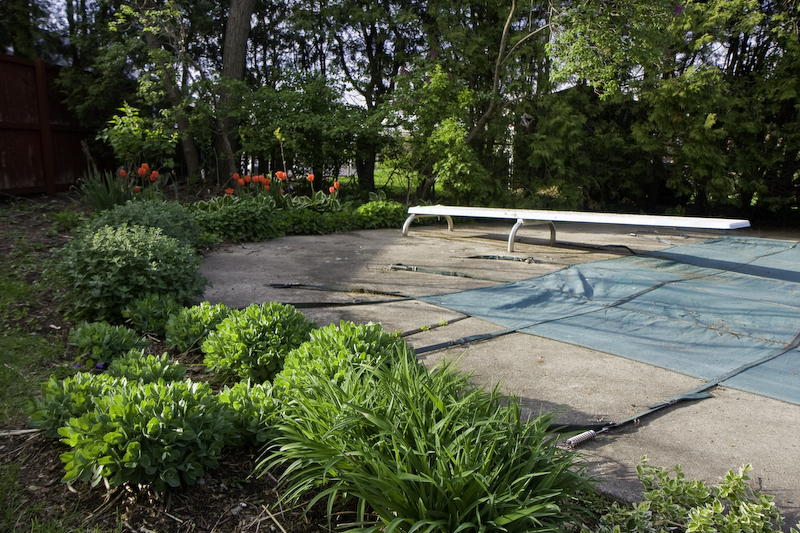
 Behind the Pool |
 |
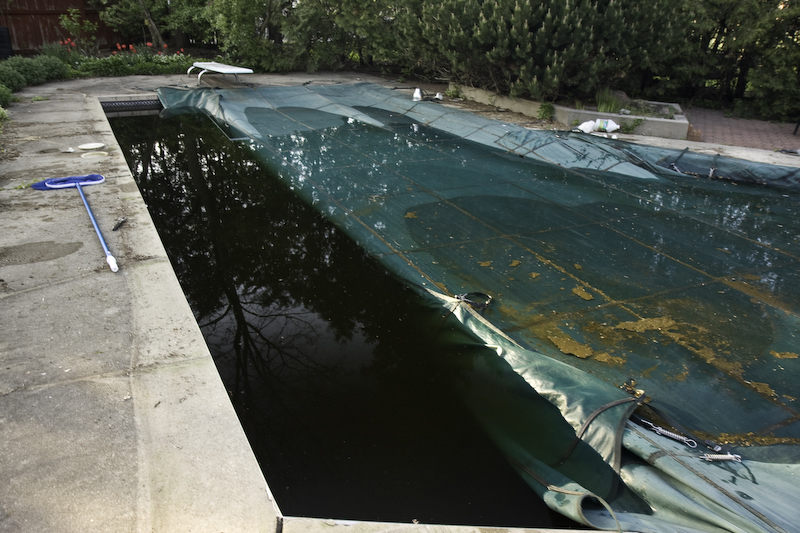
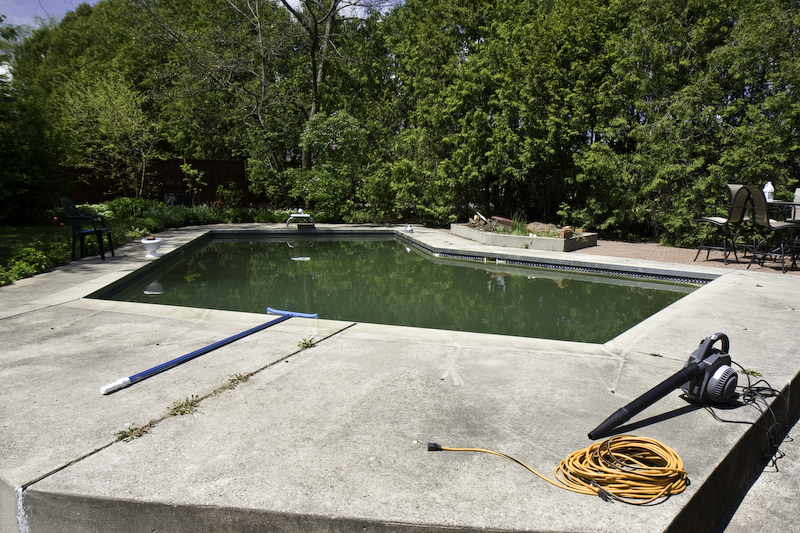
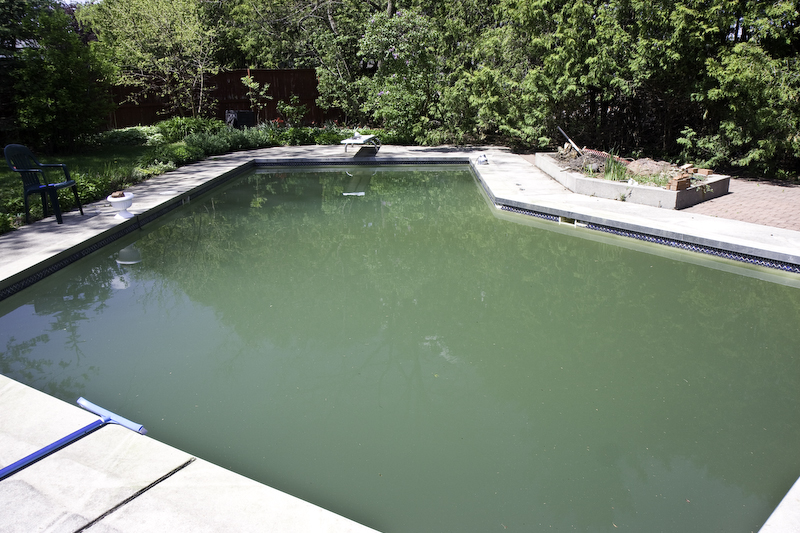
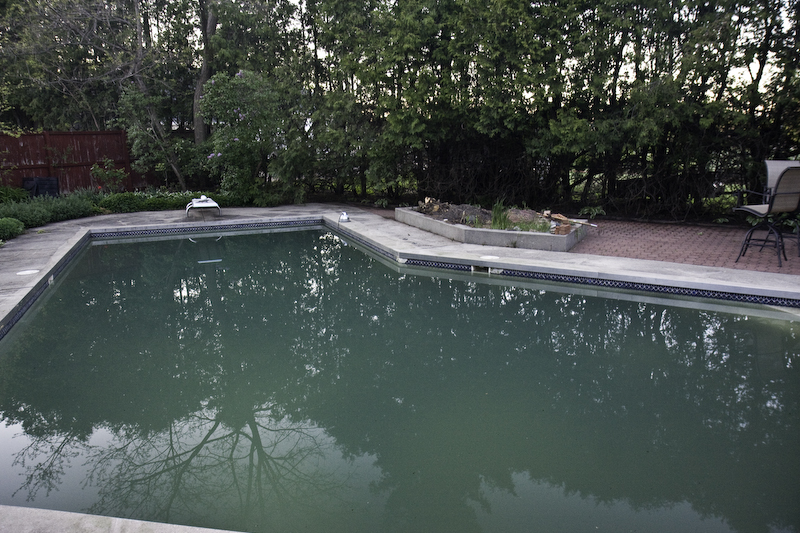
The yard work has continued and the main focus as of late has been the backyard patio/pool area. First step was to remove the crap from the cover of the pool. This was very messy but not too hard. Then I started researching what needs to happen to maintain a pool. The process is pretty easy for the most part. Test levels, adjust, wait, repeat. Sounds like lots of work but trust me it's not really. Once we got most of the old decaying leaves off the cover I could "open" the pool! Trying to locate the return lines, skimmer plugs in black water was interesting...actually I only found a single pump return only to later find 3 additional. All lines uncapped it was time to fire it up and hope it works....after a few minutes of priming it kicked right in! WAHOO we've got water flow! Let the chemicals fly! Overall the pool is coming along great! It's clearing up nicely and we should have sparkling water very soon!
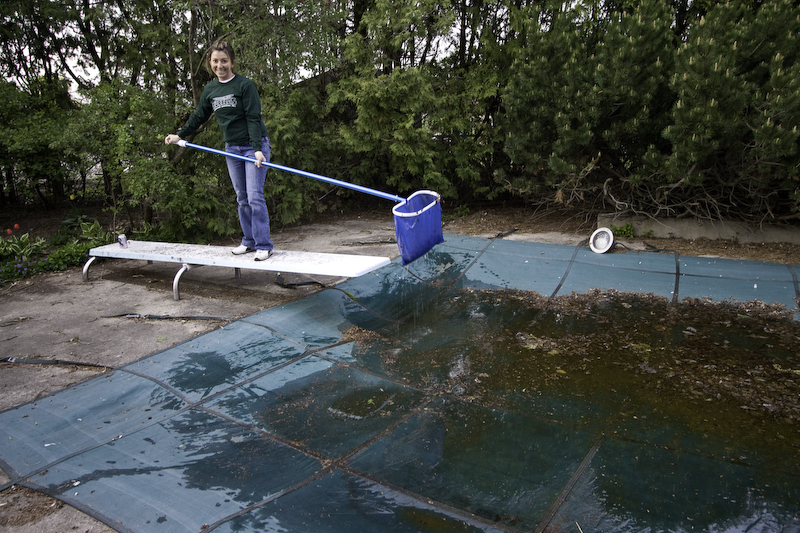 Happy Leaf Catcher |
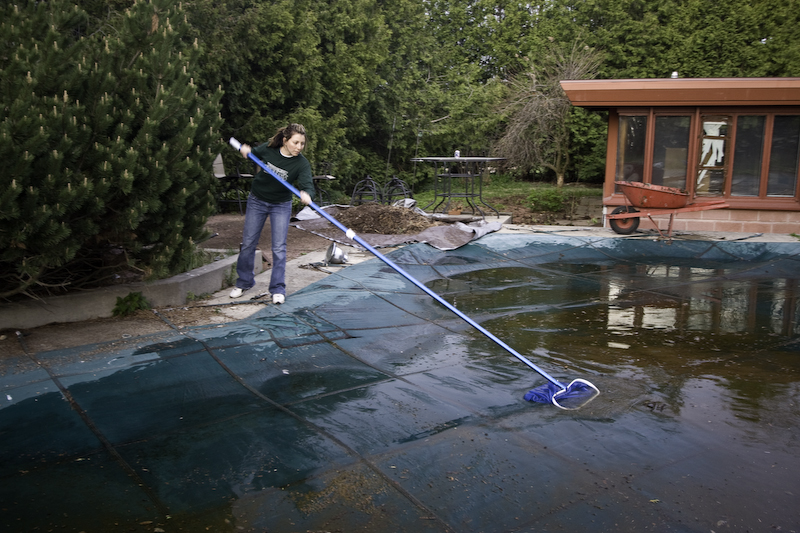 Scoop them all! |
 |
 |
 Cover reviels the water |
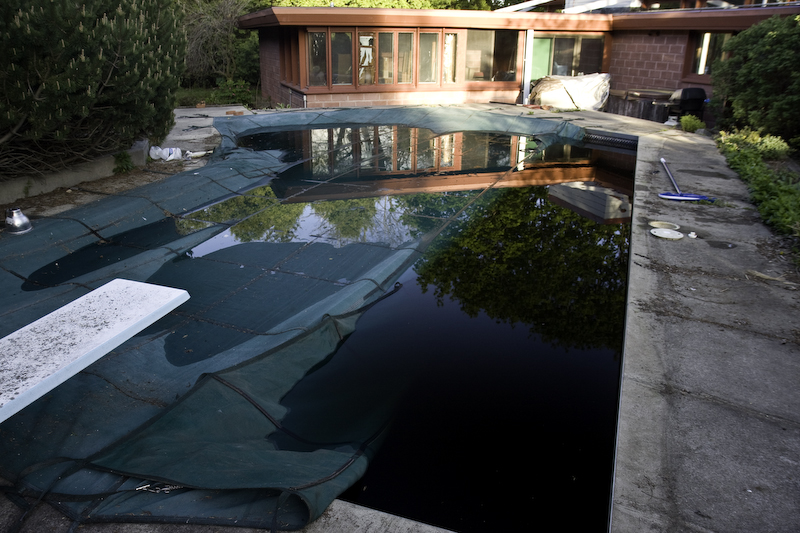 DARKNESS! |
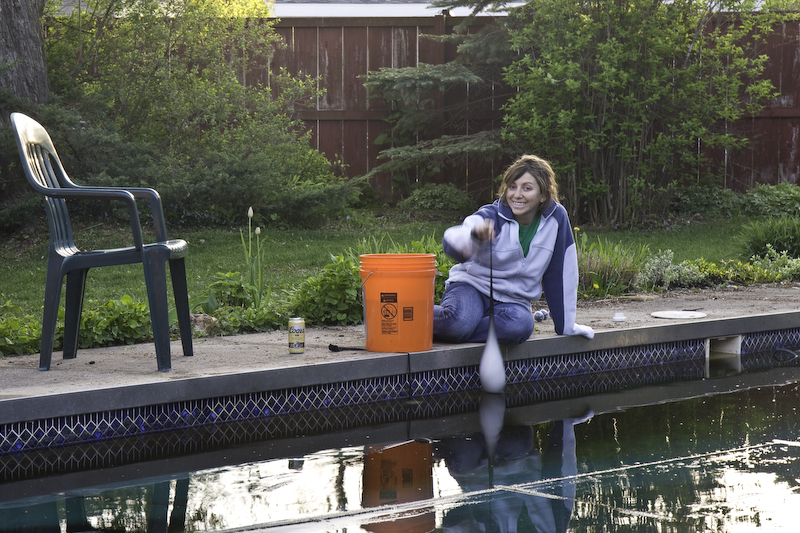 Dawn Adding Chemicals |
More Info and Photos After the Break >>>>>
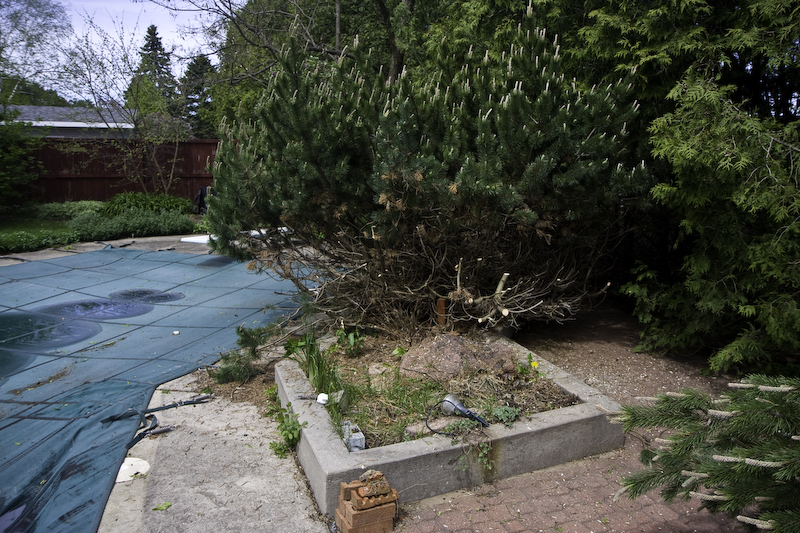
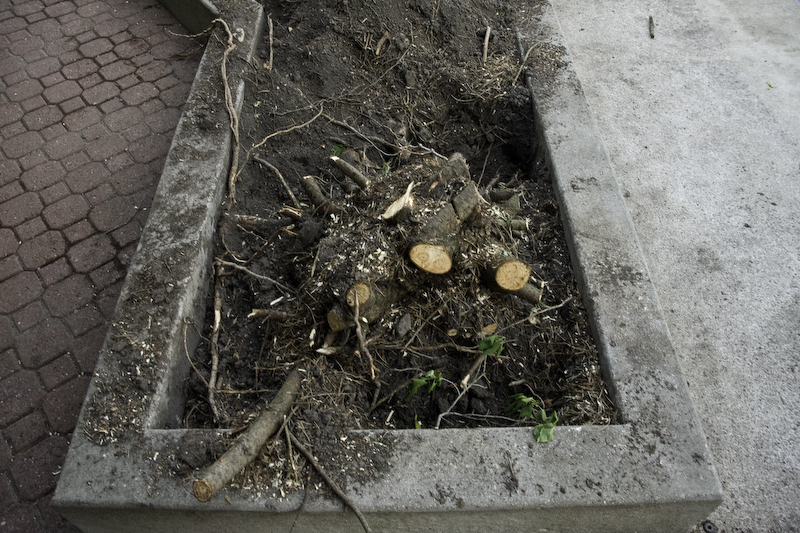
Attention then turned to the deck area. cleaning the deck up was first priority to keep stuff out of the pool. To gain some patio space back from the overgrown jungle some things needed to be removed. First up was the majorly overgrown Mugo pine in the planter. My new chainsaw took care of this quick, although leaving a massive stump that I'm still trying to figure out how to remove...
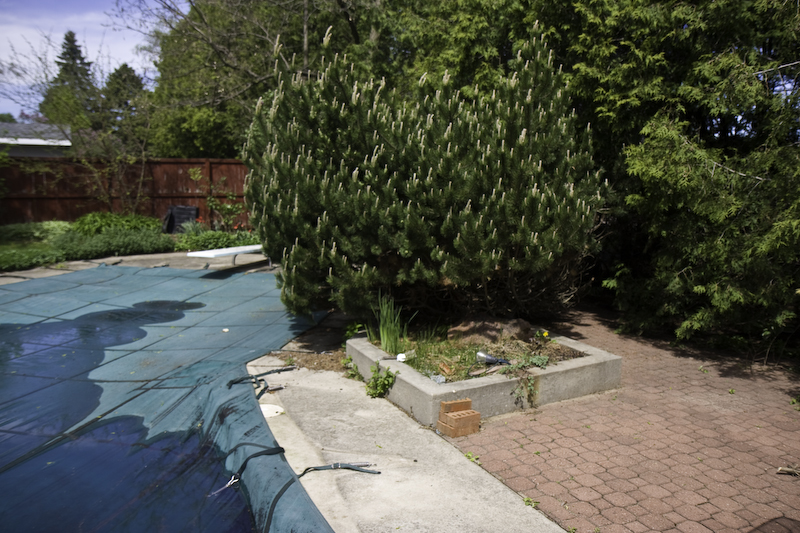 Overgrown Mugo |
 View 2 before Demise |
 During Removal |
 Love the saw! |
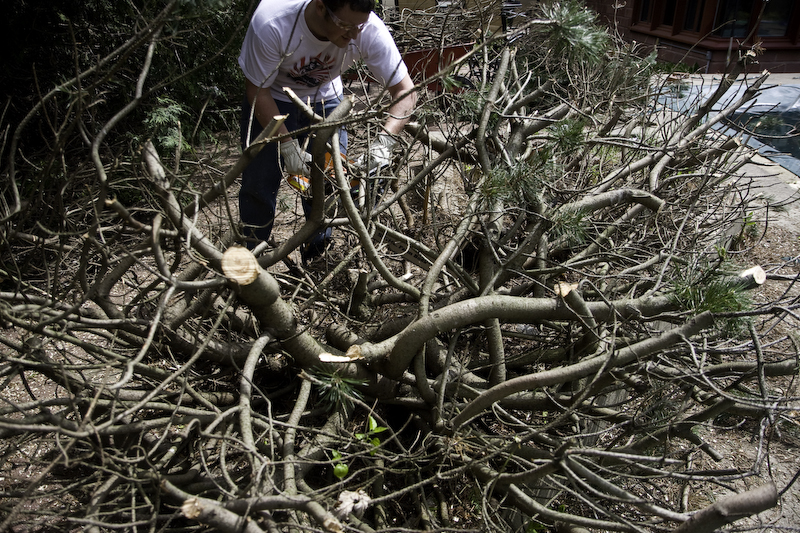 Tangled limbs |
 It's Gone |
 Cleanup |
 Massive stump remains |
 This is not going to fun |
 Cleaning up |
Then I cut back the massive arborvitaes to reclaim the patio. I tried to preserve the seclusion they offered while gaining some patio space. Cutting these out obviously removed some privacy we had unfortunately. The rear of the patio has a planter that runs under all the arborvitaes so I transplanted about 60 large ferns to provide some privacy, hopefully they will take and start growing.
 Color getting better |
 More patio space |
 Transplanting Ferns |
 Almost see the bottom now! |
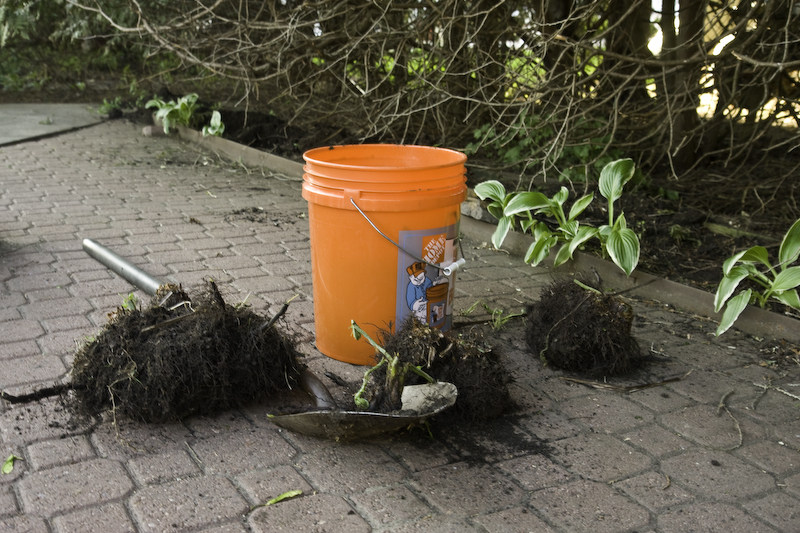
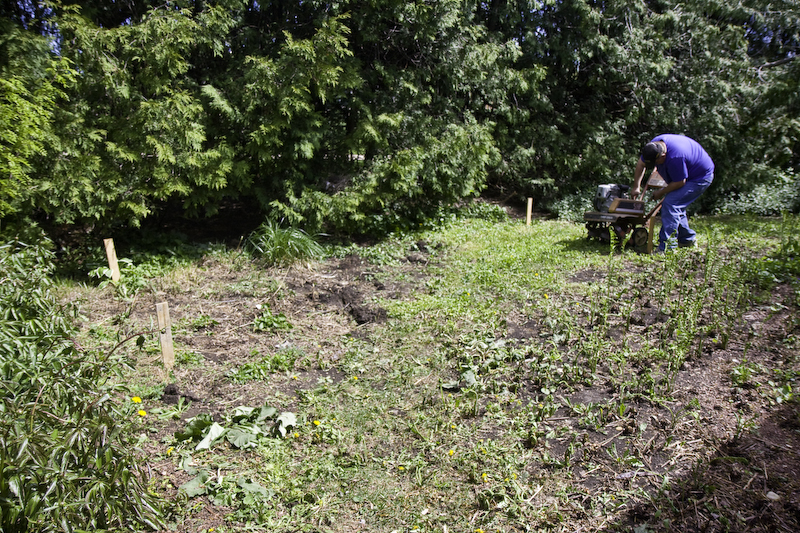
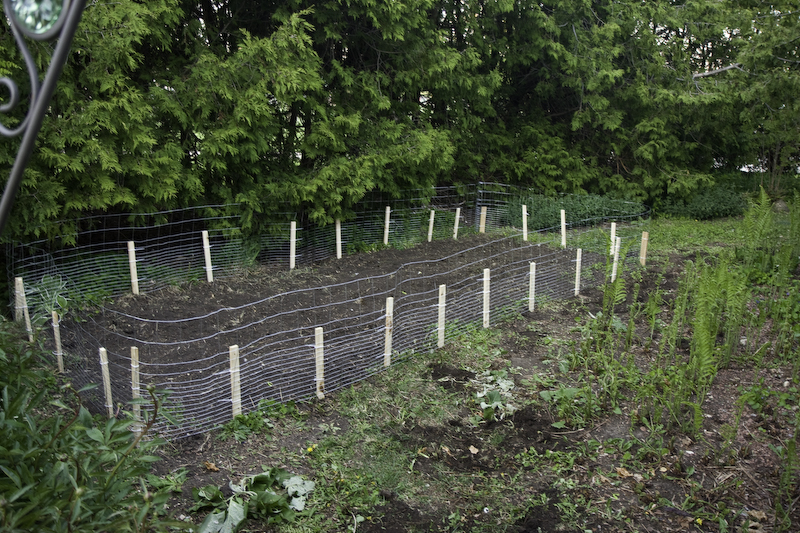
Another small yard work project was adding a small garden. I hit up CL for someone to till up a small area. $20 later we had our area for a garden. Dawn added some small fencing around to keep all our bunnies out. Garden is now ready for fresh herbs, tomatoes, peppers, beans, etc... all summer long!
 Till it up! |
 Ready for plants! |
That about brings up to speed on all the progress outside.
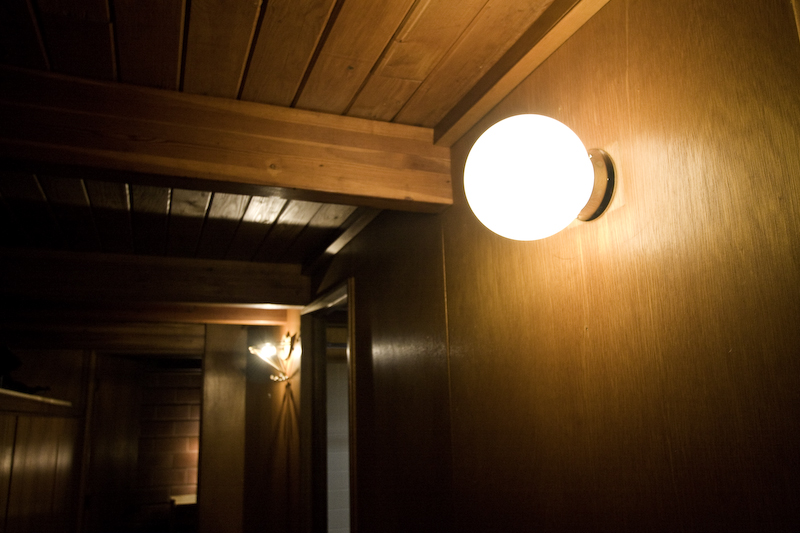
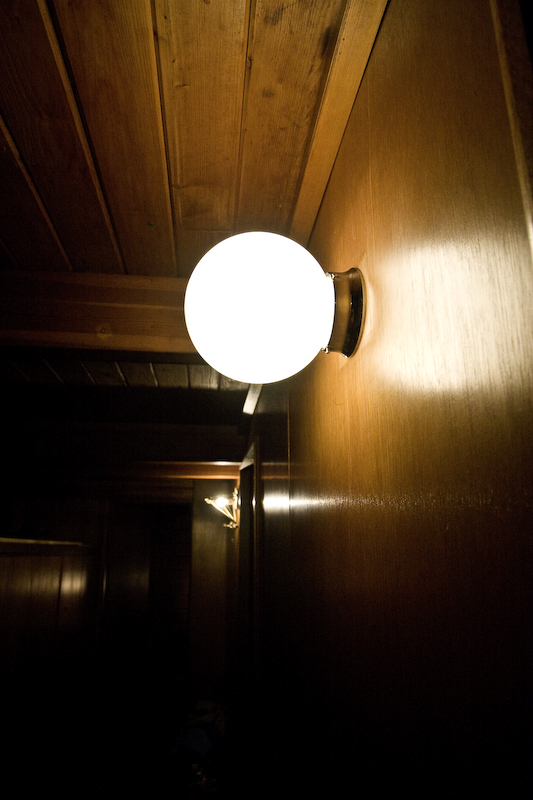
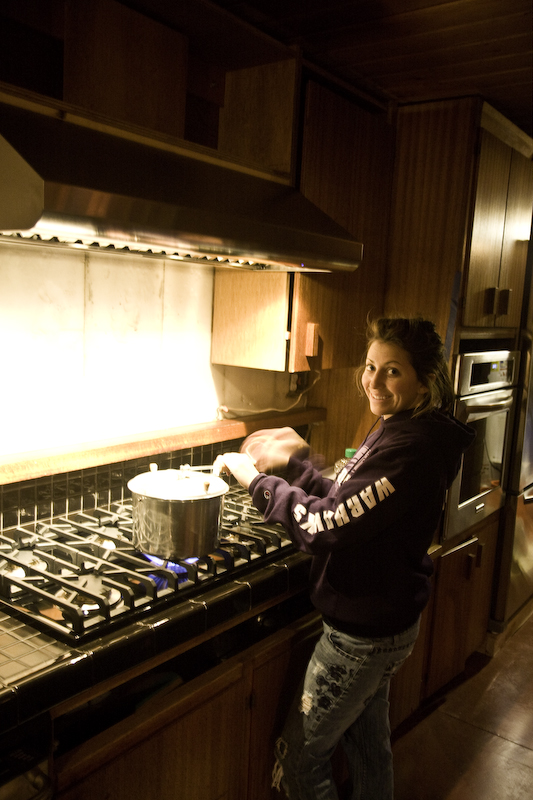
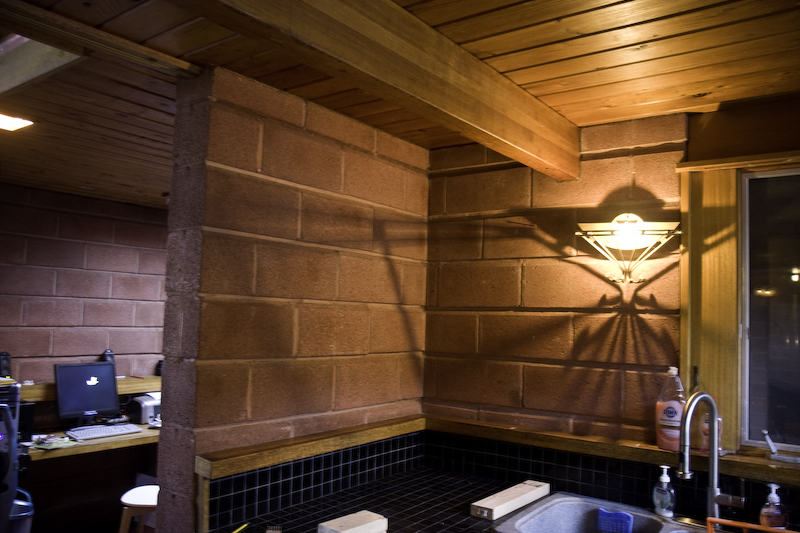
We now shift our focus to indoors, back to the kitchen and adding some lighting. The wall sconces that were in the house were not very appealing and very dark. I've been looking for lights for a while and finally figured out a cheap and nice light. Simply a base with one of those glass balls for a cover. Looks much better and coming from a 15 wall bulb to a 60 provides ample light!
 New Light with old in background |
 View 2 |

 Anchored to the wall |
 It's Hanging! |
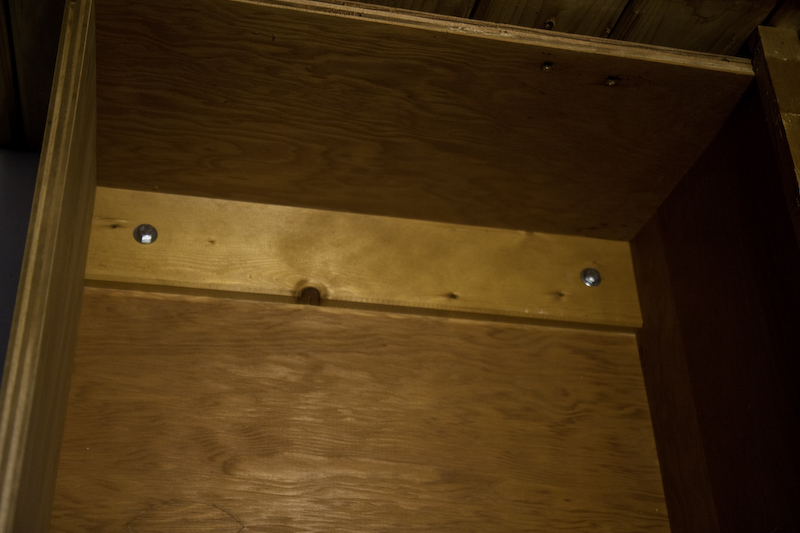
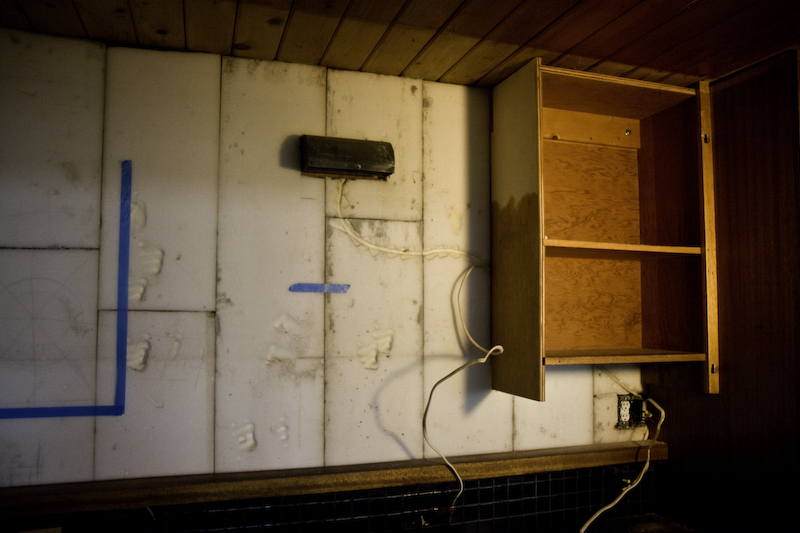
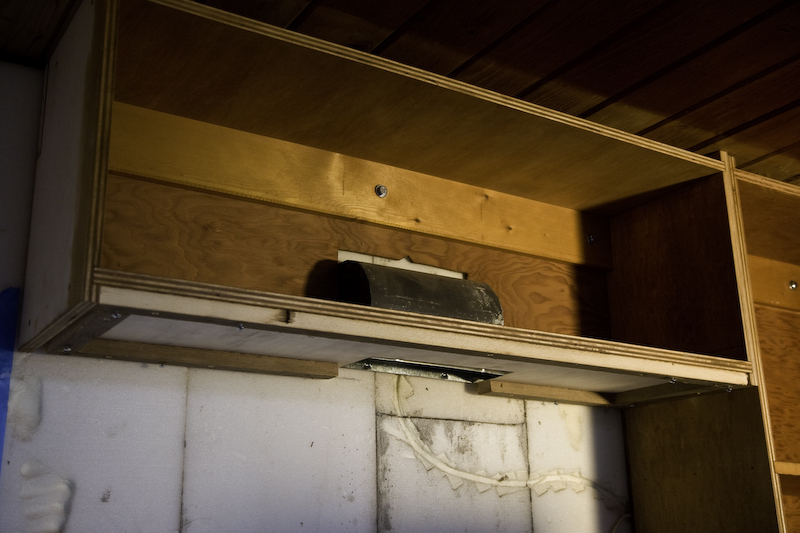
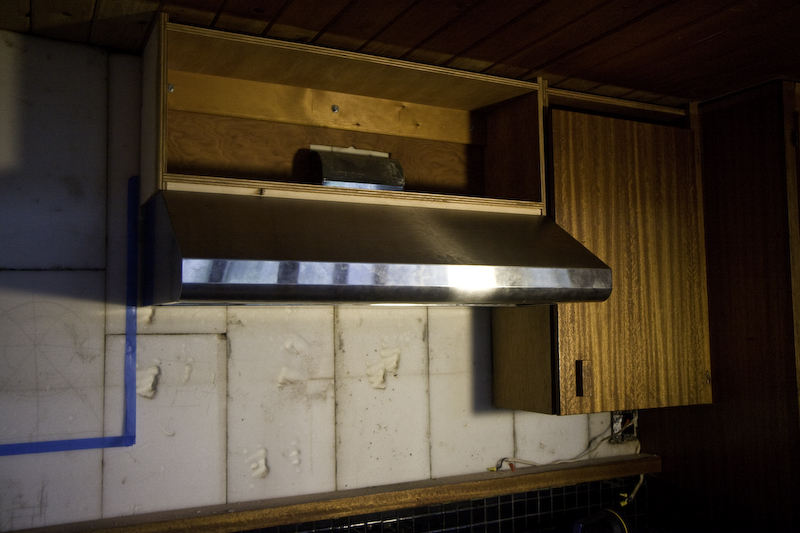
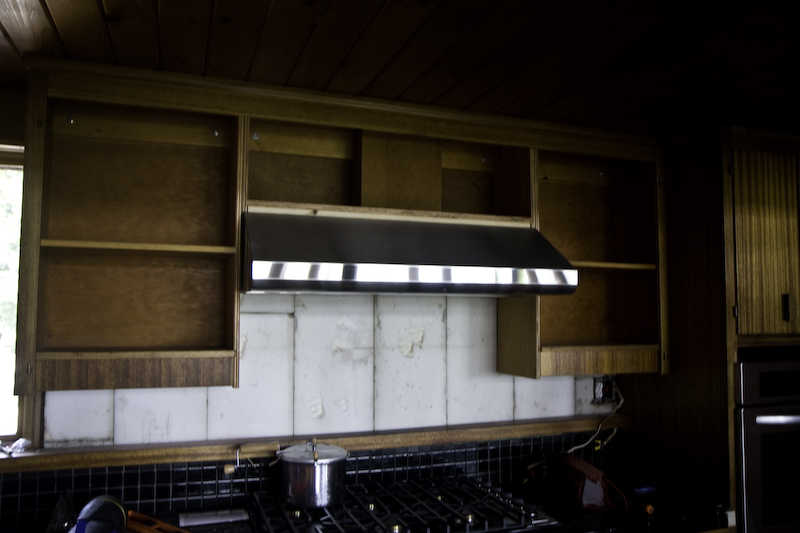
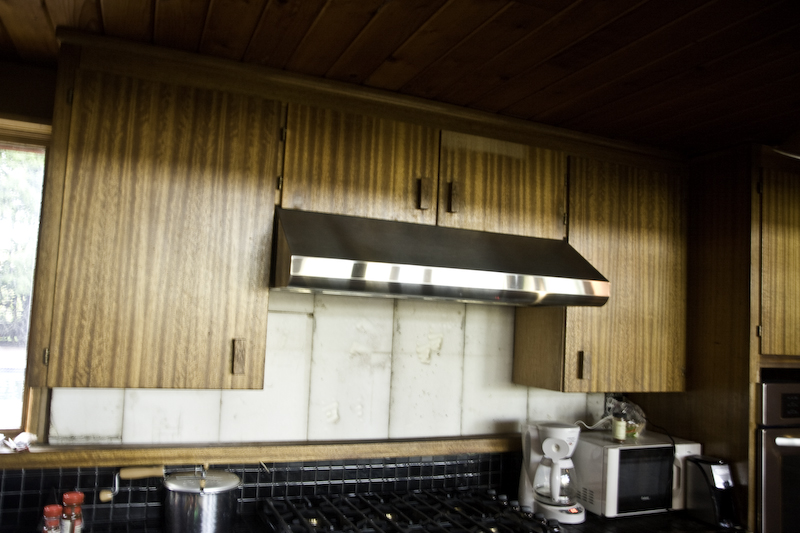
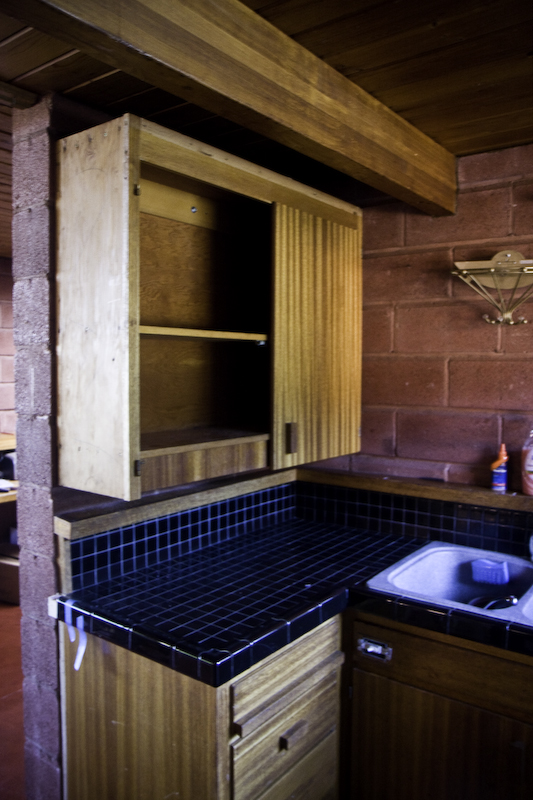
Next was building a new center cabinet to mount the new range hood to. This was a little challenging because the exhaust hood was close, but not exactly centered in the cabinet. Obviously the hood had a center vent so fabricating changes to make them connect took some time. After mounting the cabinet and setting the connection we did a test fit. Everything seems to fit good! Hanging the hood was a real chore, even for 2 of us. Finally we got it hung and wired up! Dawn tested it out with a fresh batch of popcorn.
 Fit looks good |
 Blends Nicely so far |
 Test Mount |
 View of hangover |
 |
Last was the left cabinet. This needed to me measured very precisely to fit perfectly. Details are what really take up time, but are very essential! Cut and assembled to find out it fit nearly perfectly!
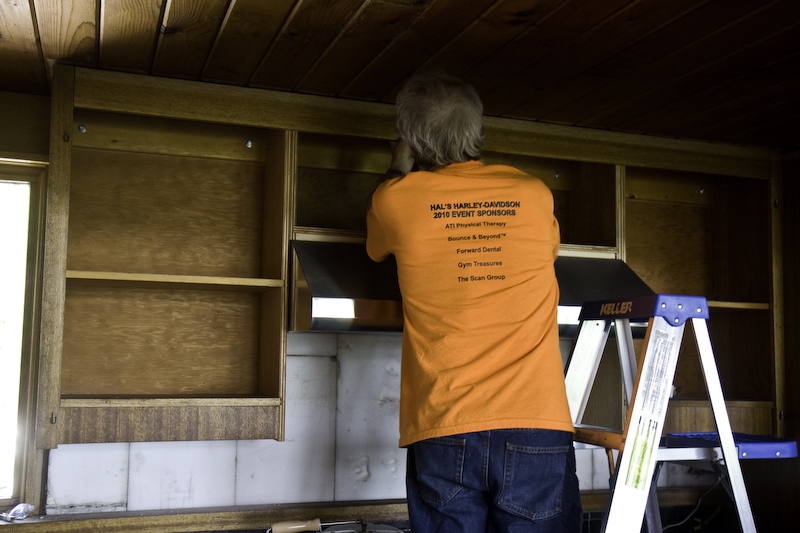 My Dad Measuring |
 Looks nice! |
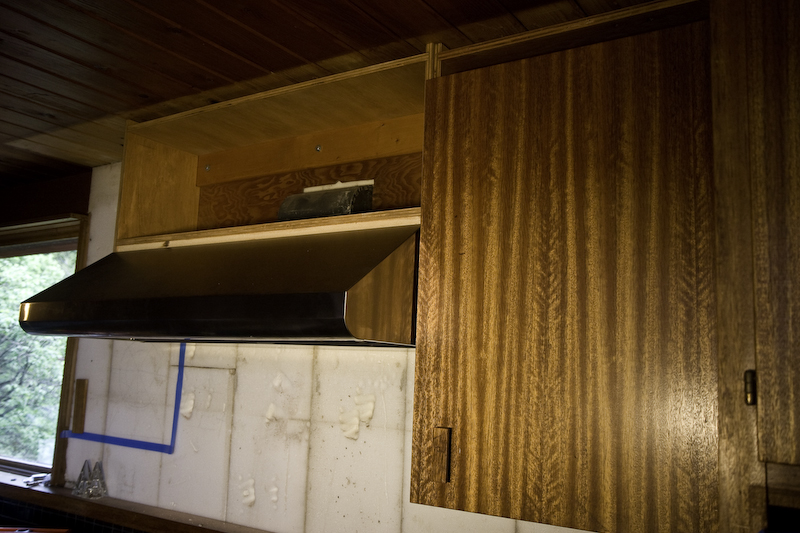
They were then trimmed and it was time to add the doors. The doors were reused but needed to be dadoed larger to fit in the new cabinets. The new upper cabinet required to cut the existing doors in half. Cutting and dadoing the existing doors was a little nerve wracking, although everything worked out great! My father had a great idea of angling the bottoms of the doors above the range hood to hide the bottom of the doors. These cabinets on the north wall turned out fantastic! The new design blends very nicely with the other existing cabinets, almost like they were always like this.
 Angled bottom! |
 Matches hood angle perfect! |
 Doors added! |
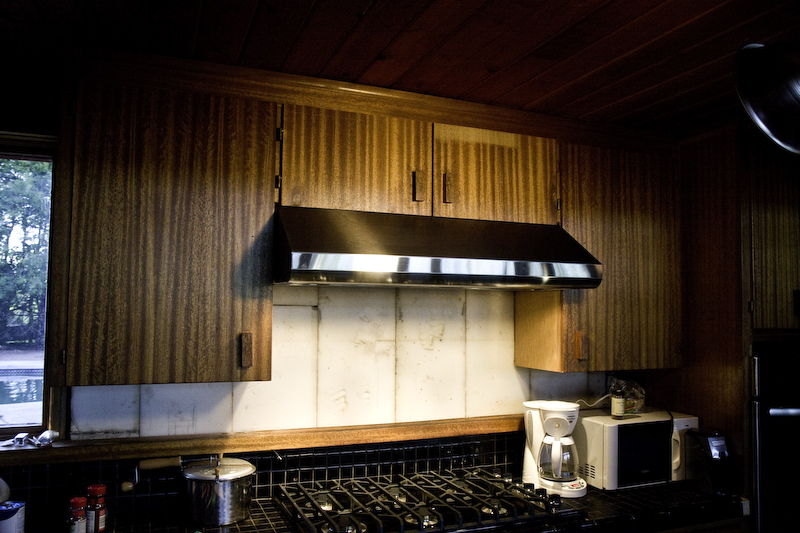 Looks seamless and origional! |
 New Dados |
Also my idea of moving an existing cabinet to the south wall next to the sink came to fruition. We set the height to allow the doors to swing under the beam and anchored the cabinet to the wall with the Fastenal anchors. The cabinet fits great! the end just needs to be trimmed with mahogany and we're good to go. A repair was needed on the door because the hinge was broken. Packing with wood and glue than clamping and curing is the cure here. Then sand and re-stain to match. Works perfectly!
 Before Cabinet |
 It's hanging! more space! |
 Detail of fixed door |
 ready to match existing finish |
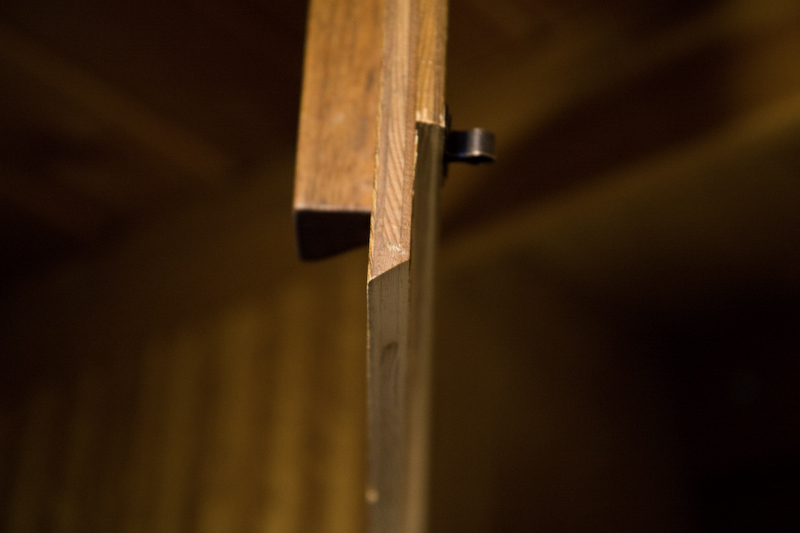
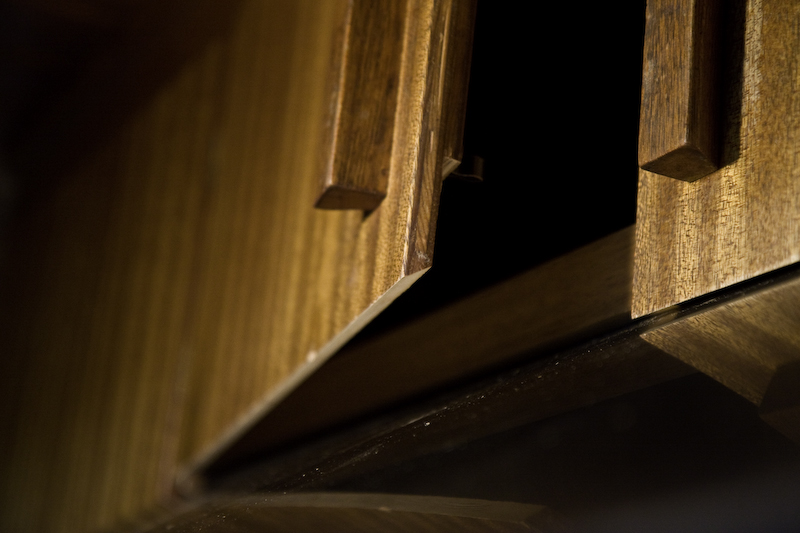
While working on these cabinets I was sure to take some photos of the hinges so that I can try and find some matching ones. These are a great design, although hard to mount. I've got some research to do to get more of these for the new island cabinets.
 Hinges connected |
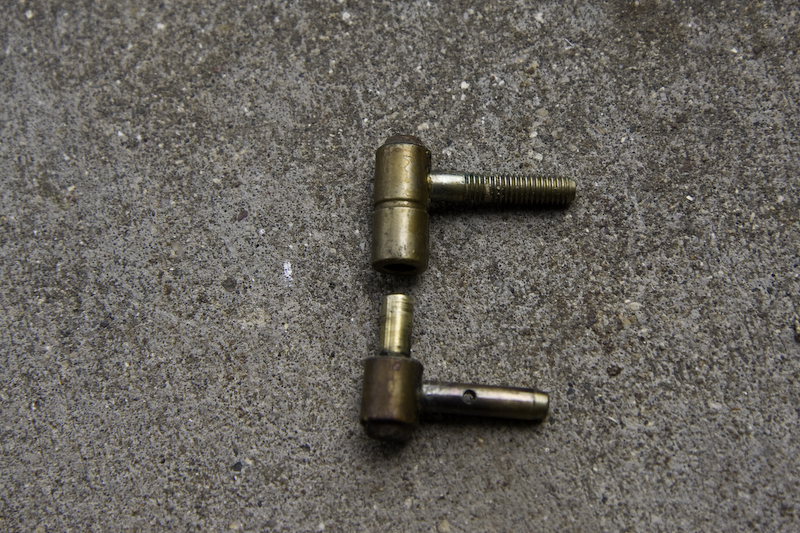 Both Pieces |
That about brings us up to speed. Hope you're still with me and not sleeping....Stay tuned for (hopefully) smaller posts to ease the time spent getting updated.
IM
3 comments:
cant wait to see all your work in person soon hopefully!
claire
Just reading about your adventures makes me tired, but I keep your accomplishments in mind while we tackle work on our daughter's first home, built in 1954. It's not a Usonian (we should be so lucky...) but Usonian is what we keep in mind as we try to undo the 70s-era "improvements". Keep up the inspiration - *please*. Your place is well on its way to perfection.
Karla,
Glad that I can offer some inspiration to you! I understand the "improvements" you speak of. Keep up your hard work at your daughters place, as I'm sure she appreciates it very much, as do i with my parents help that they offer!
Post a Comment