
Well again busy times have been upon us. Winter and cold weather is coming soon, although I'm kind of ready for a change of season. That's what is nice about Wisconsin, you get a new type of climate every few months. Anyways with snow coming we've been focusing on things that need to happen before the snow fly's and the leaves fall, although that's already almost complete.
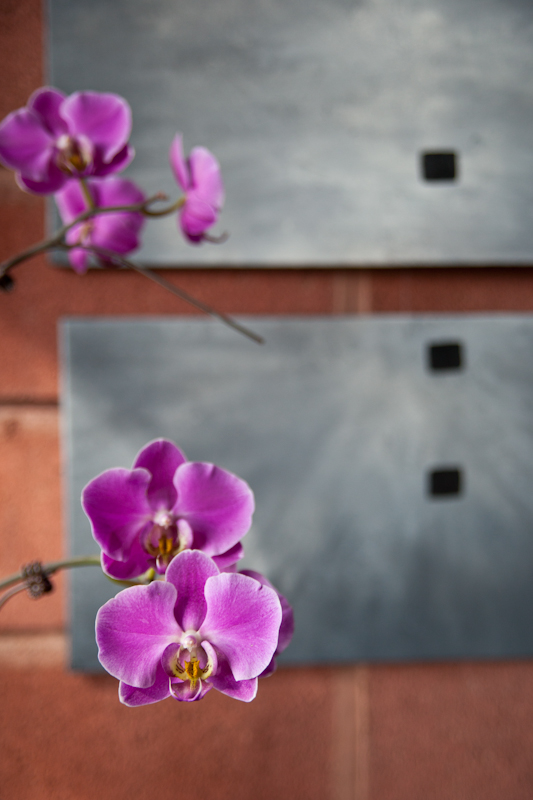
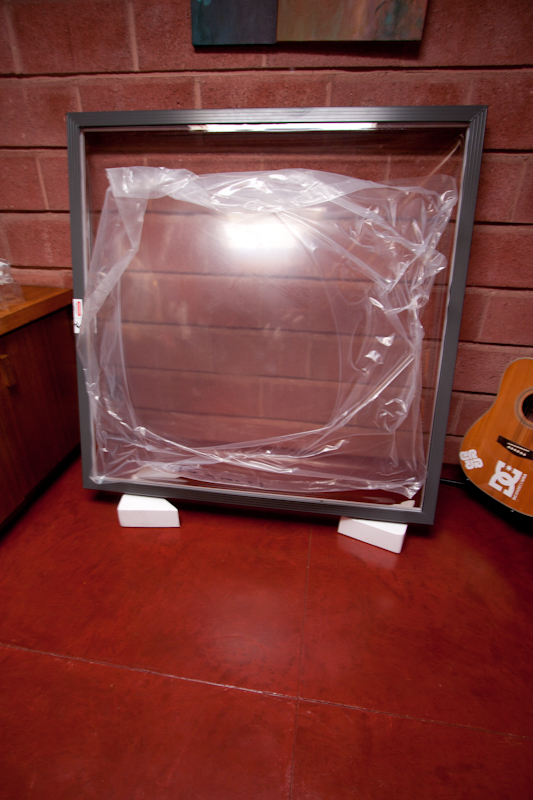
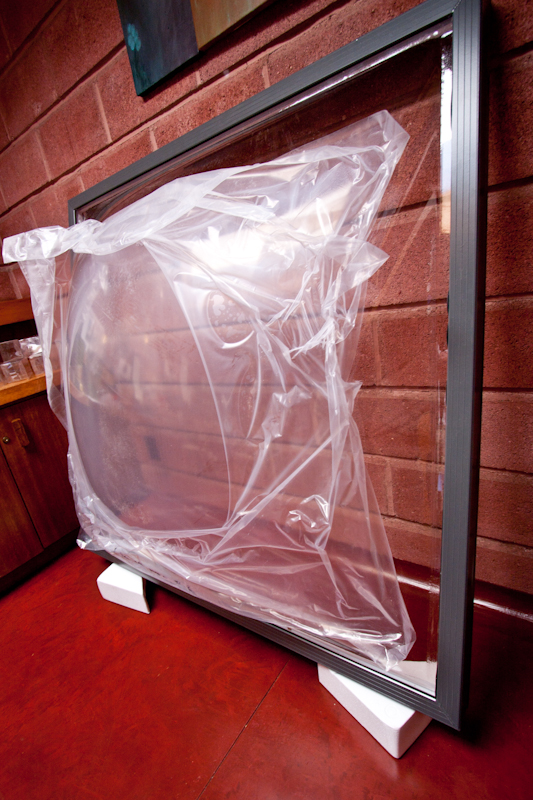
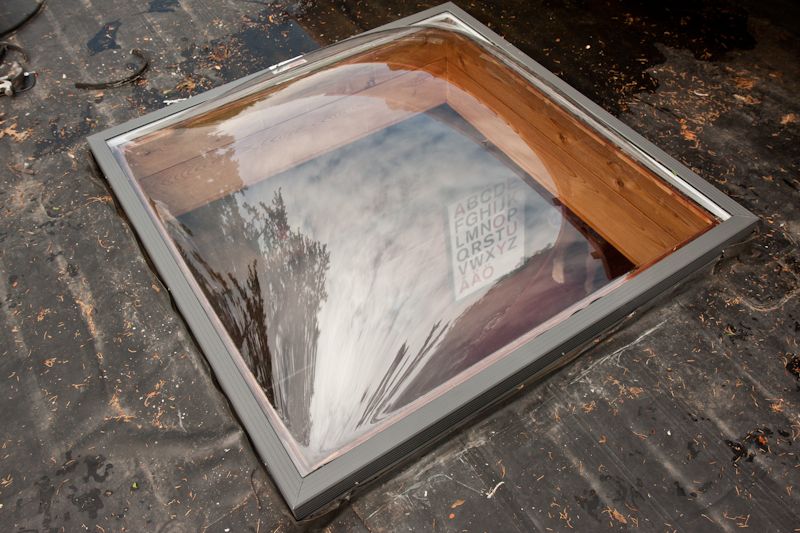
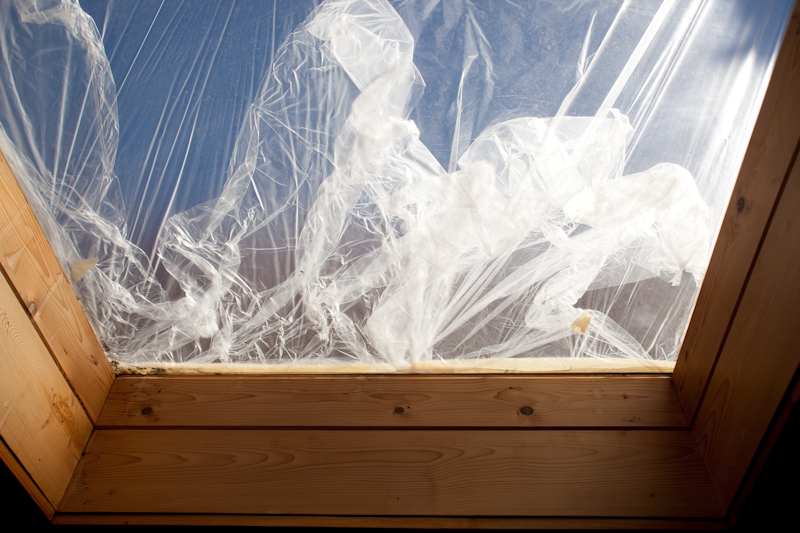
The major completion is a new roof! YAY it's the little things that matter and something as small as no more leaks is enough to lift your spirits and stop worrying. The first thing that needed to be completed was adding the new skylight. Well after waiting forever to get a correct skylight it finally came, wrong again! I ordered an opaque skylight and a clear one was delivered! It was although the correct size this time, so install started. I've never installed anything like this before so I had no idea what it would be like. After removing the old one it was actually pretty easy to install.
 |  |
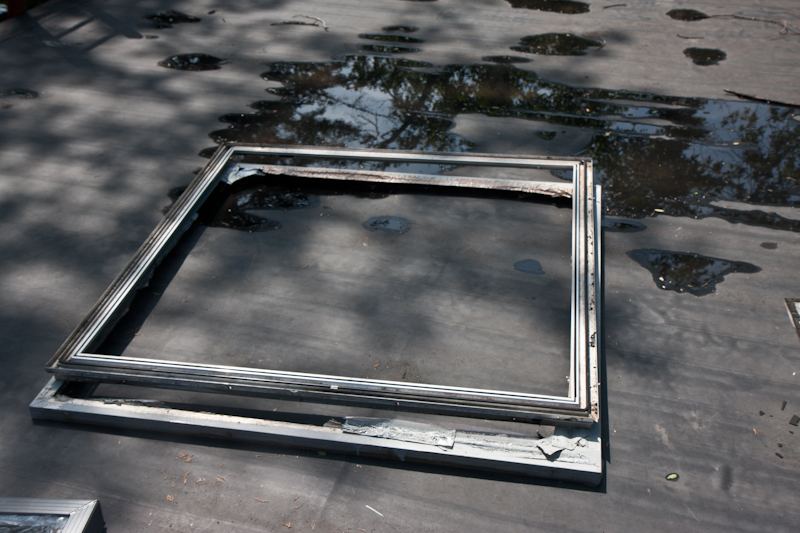 Old frame just separated | 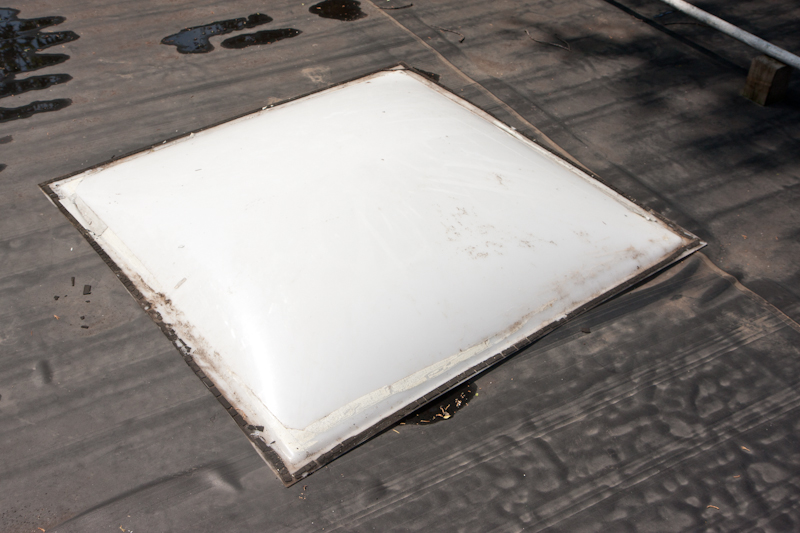 The old inside layer |
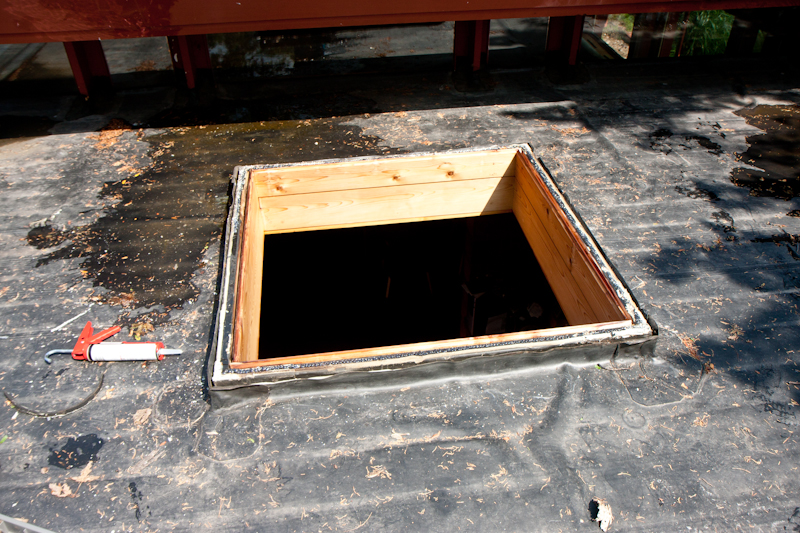 The old removed and prepped | 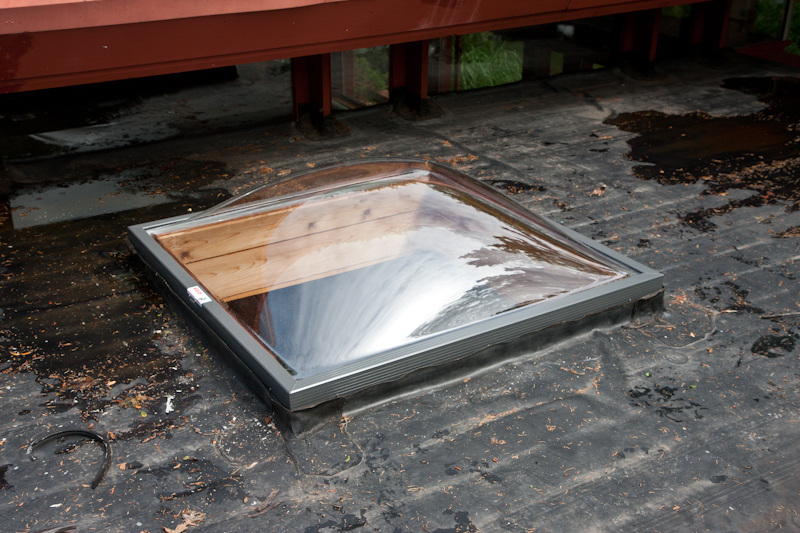 It's In! |
 Sealed Up. | 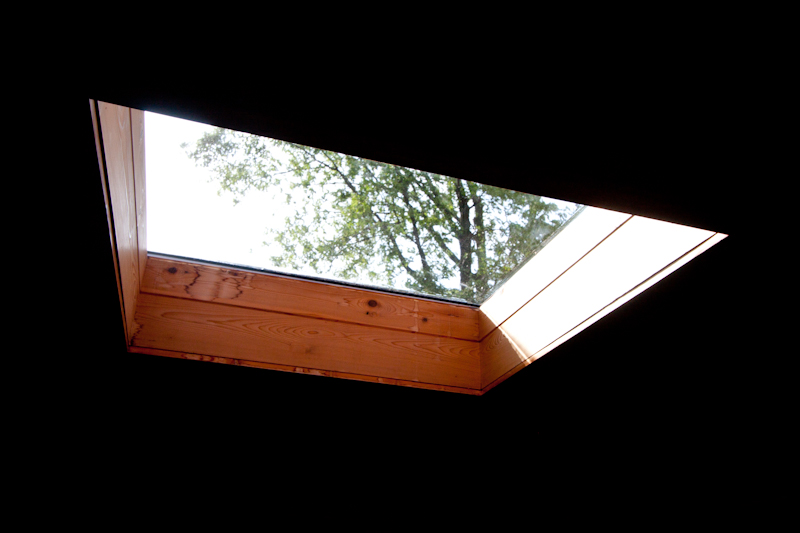 Not sure about the clear but it's nice to look out. |
Although I was upset that they messed up my order again and got me a clear, it's growing on me and most importantly it fits and does not leak! Painting the other upper roof window was the only other thing to do before the roof can be done.
 Primed Up | 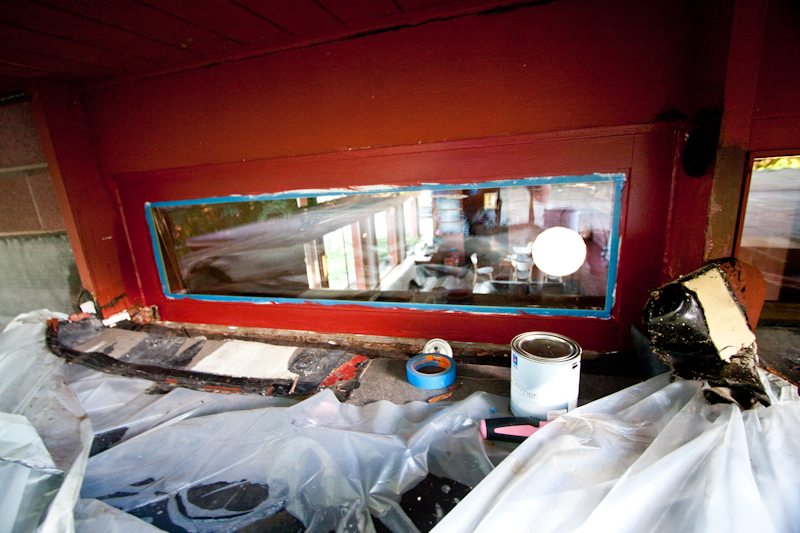 Painted and ready for roof! |
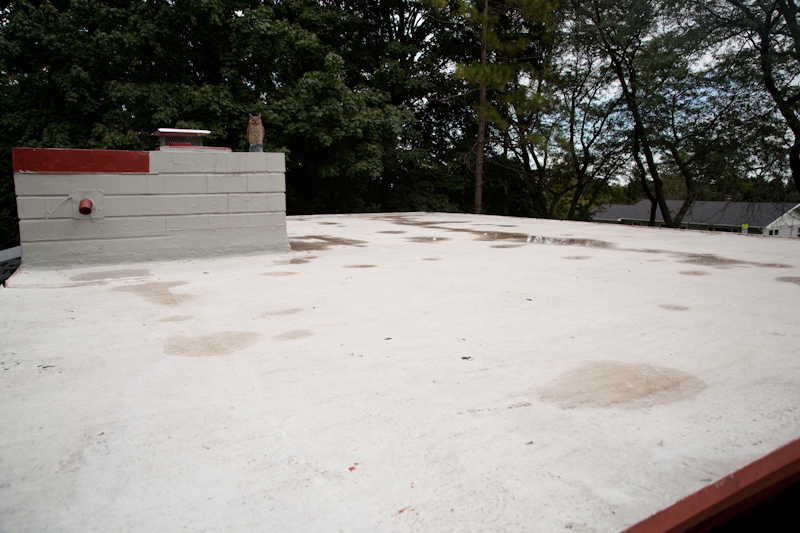
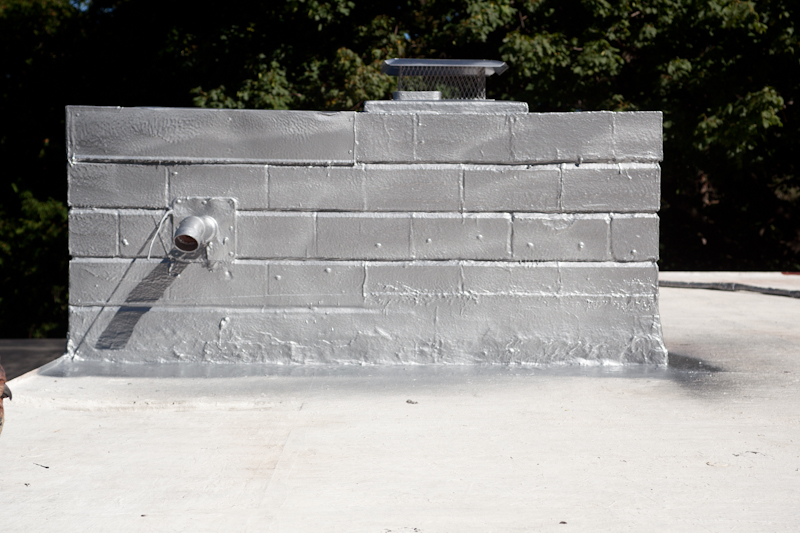
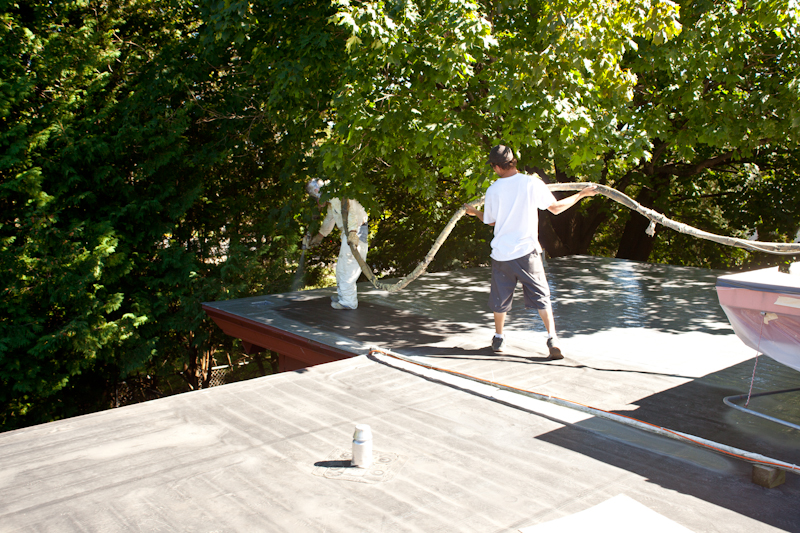
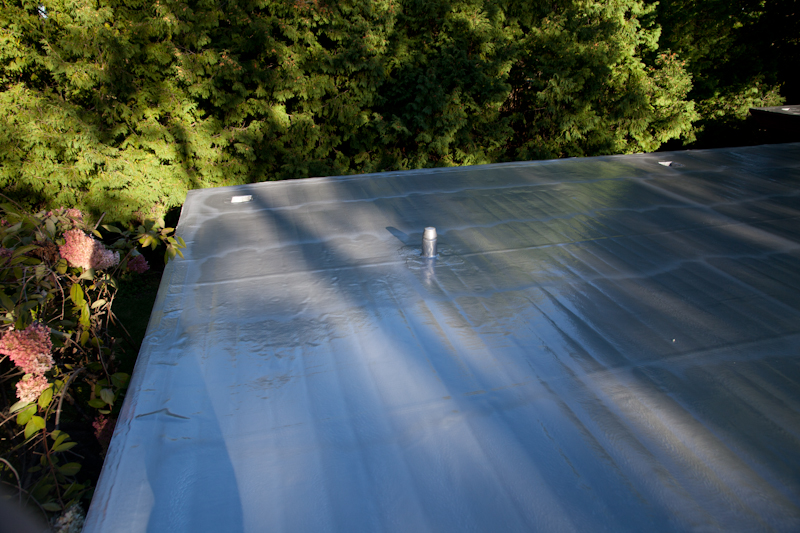
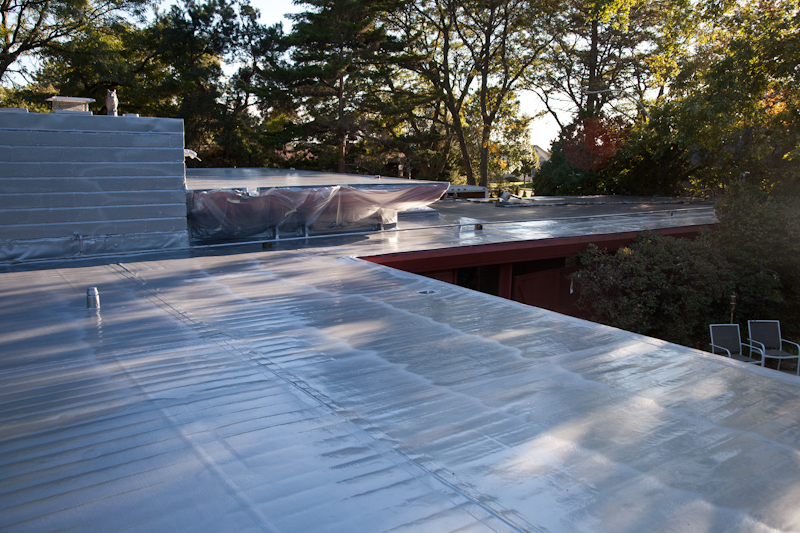
The new roof is a stray on Polyurea roof, the best part is there are no seams! It was added directly over the existing roof. Application seemed pretty easy, although I did not do this. Step one was cleaning and power washing the rubber roof. Then the new roof is simply sprayed directly over the old. As soon as it is sprayed it can we walked on and is hardened. It's tear proof, flexible and reflective for heat! Once dry it is about 1/8" thick. It sprays on silver and will eventually dull to a light gray color. Right now it looks like were attracting aliens with how shiny it is!
 They're Here! | 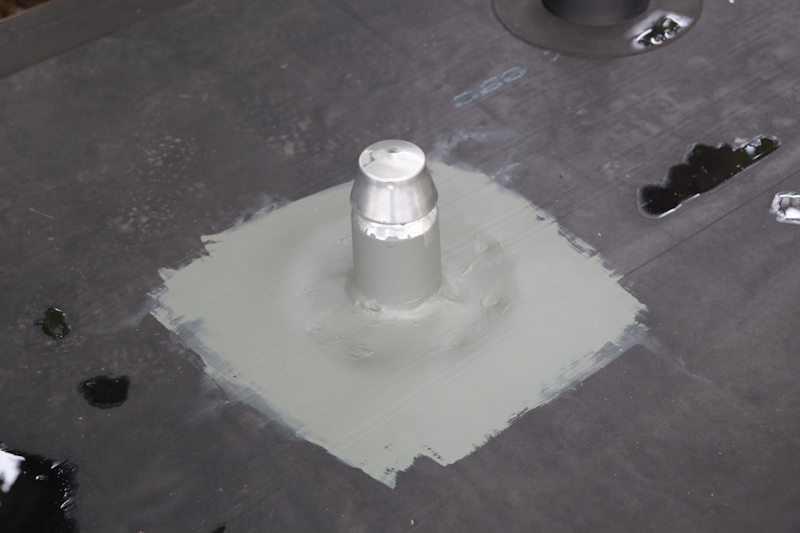 A few vents were installed. |
 Cleaned up and prepped. | 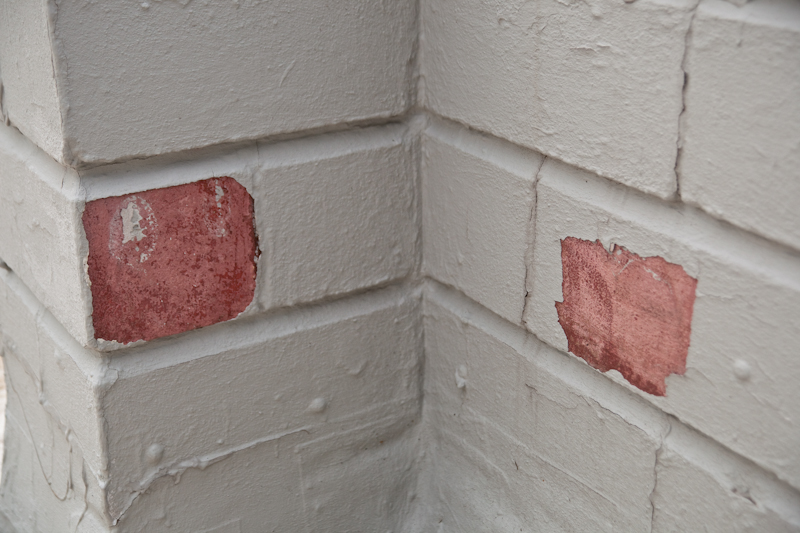 Chipped area on the chimney. |
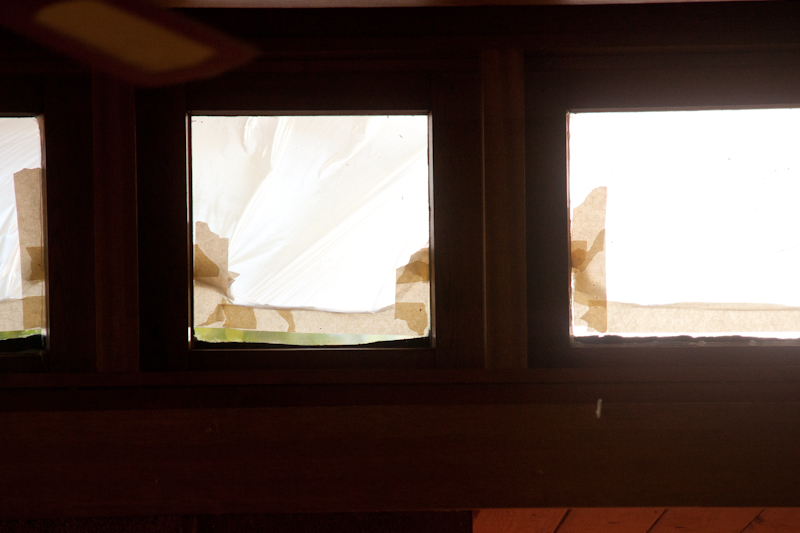
 |  Skylight Masked off |
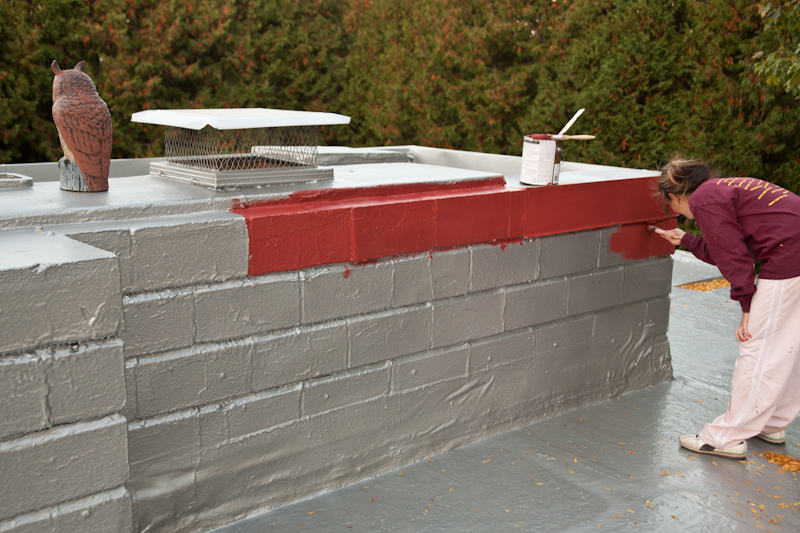
Another cool feature is that it can be sprayed on vertical surfaces too. This is nice because I had them completely cover the chimney area on the roof to ensure there will be no leaks. So far it's not leaked and that's the exciting part! No more pots, pans buckets, and towels! After it site for a few days it's also paintable! This is nice because we then painted the chimney so that you cant see the silver sprayed chimney. everything is red and blended in to the house!
 |  |
 Application | 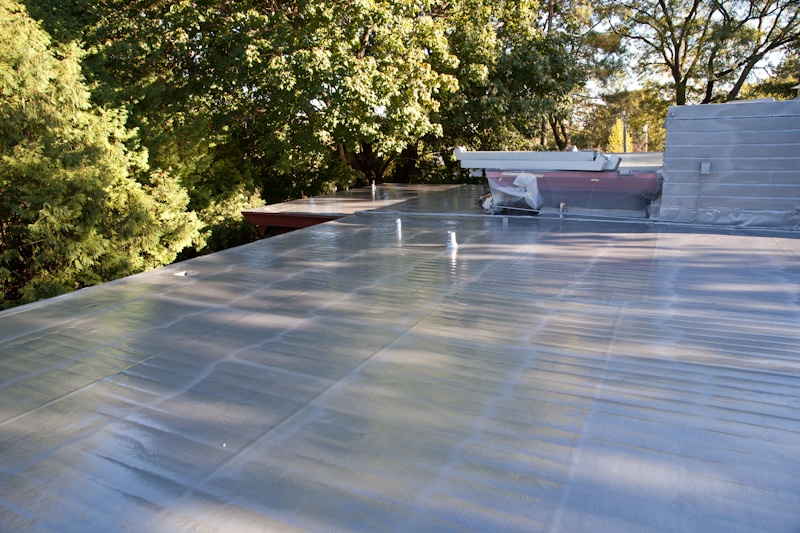 Mostly Complete! |
 |  |
 No more air cleaner. |
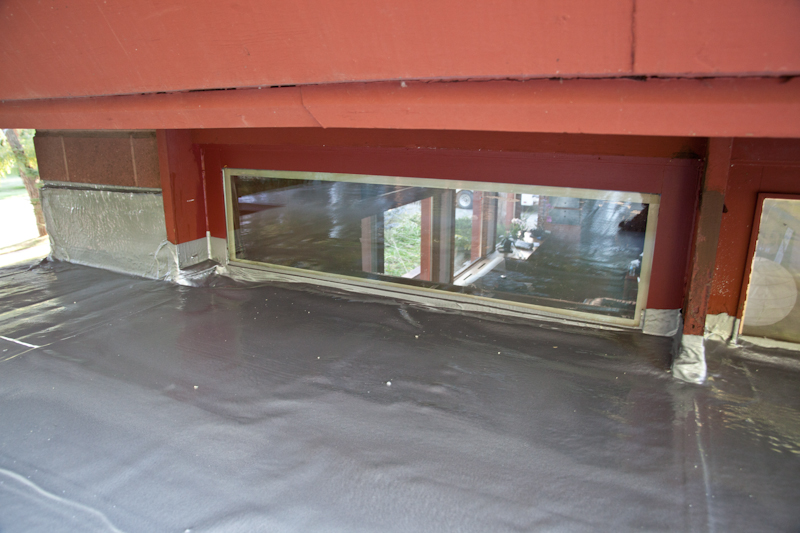
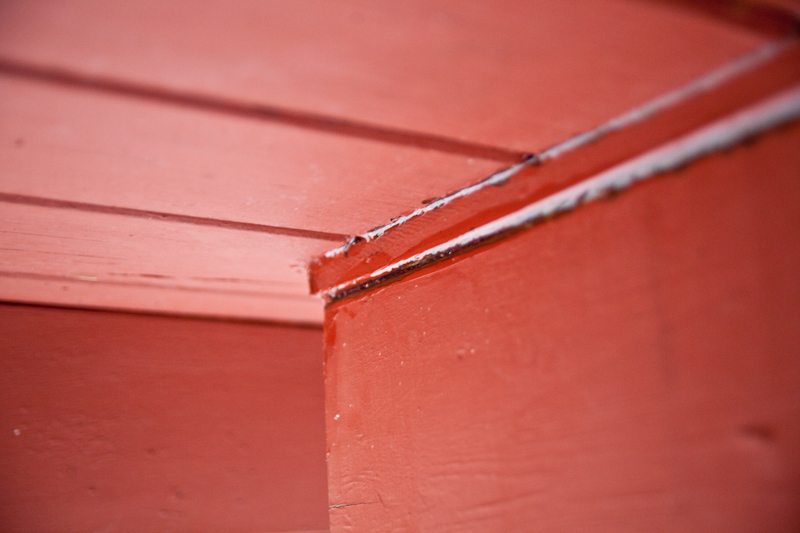
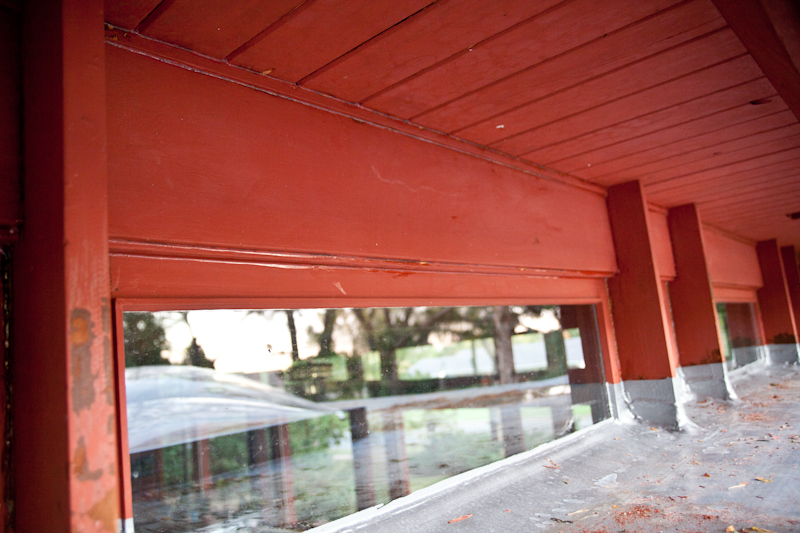
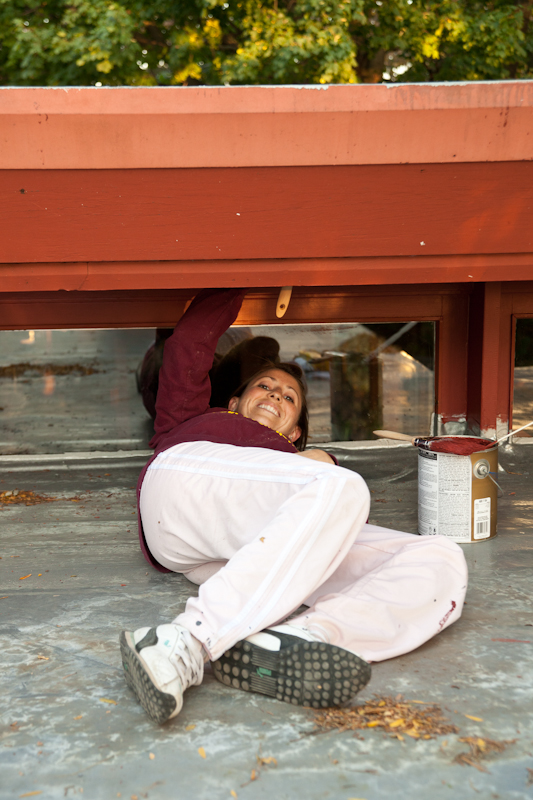
While the roof was being sprayed I noticed the eves on the upper roof were in dire need of a fresh coat of paint. Now we all know painting is no fun, especially everything that is included in painting besides the actual painting act. Then add the fact that painting the upper roof eves requires most of the time laying down or in a contortionist position because everything is tucked under the roof and hard to get to especially up side down. I want throughout the procedure of painting an exterior wood house. First scraping everything and removing all the chips, dirt, and old caulk. Then I sprayed everything with the hose only to find out massive leaks around the window sills and the boxcar type boards used on our ceiling. Basically the channels in the ceiling ran directly above the windows and outside to the eve area, Now this is not really a big deal because it would never rain under their but it does release lots of warm air in the cold months. After cleaning everything up with a spray and a good brush down, all the channels, sills, and cracks were sealed up nice and tightly with a new caulk job.
 |  Scraped up and ready for a wash! |
 Corner caulked. | 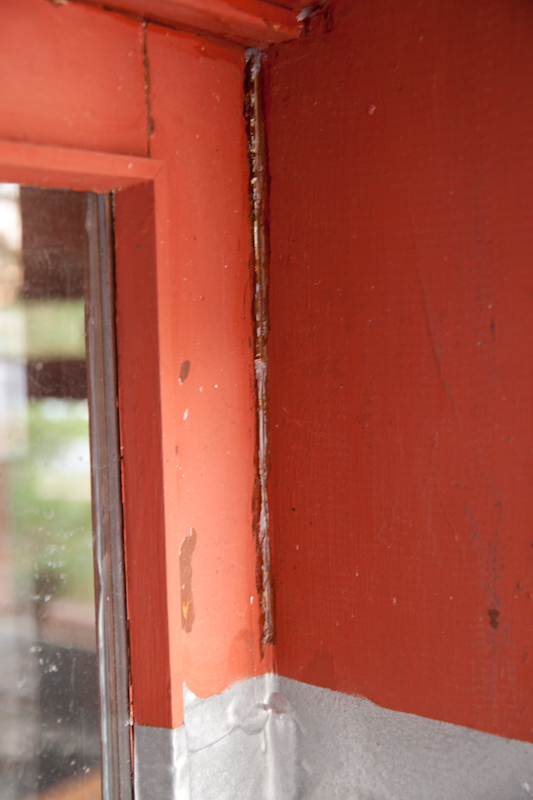 All cracks area sealed |
 Ready for paint. | 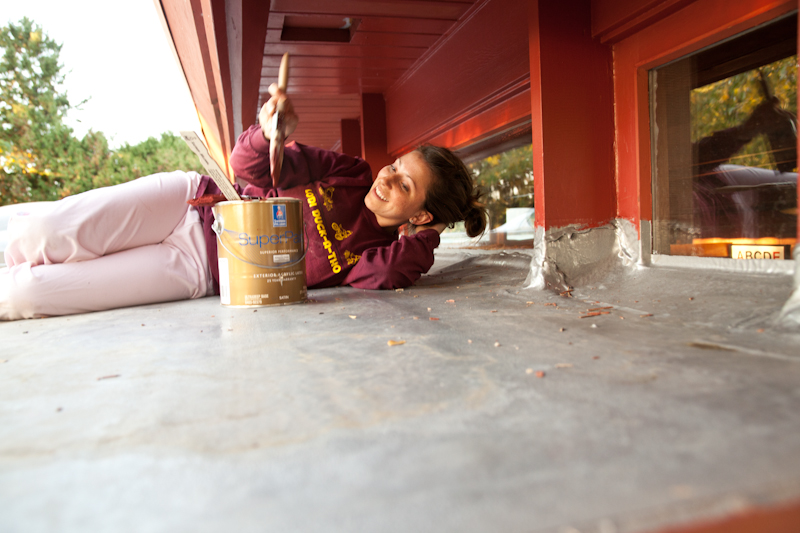 Dawn helping with the job. |
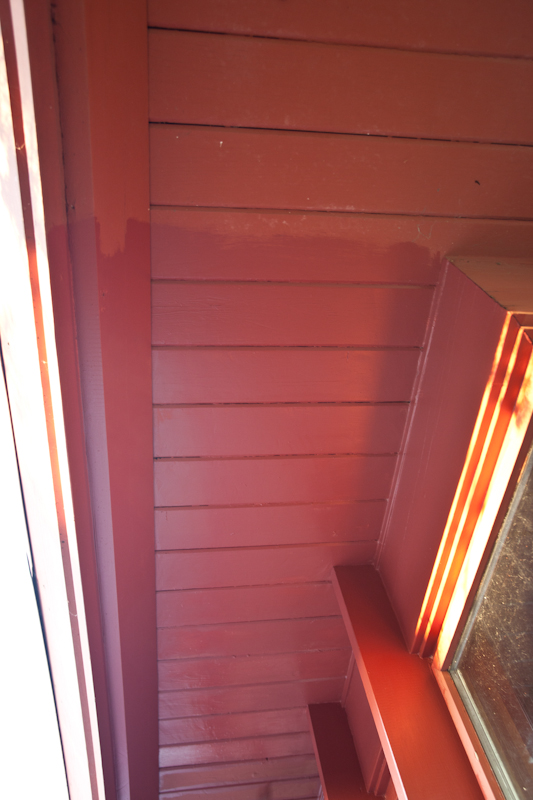
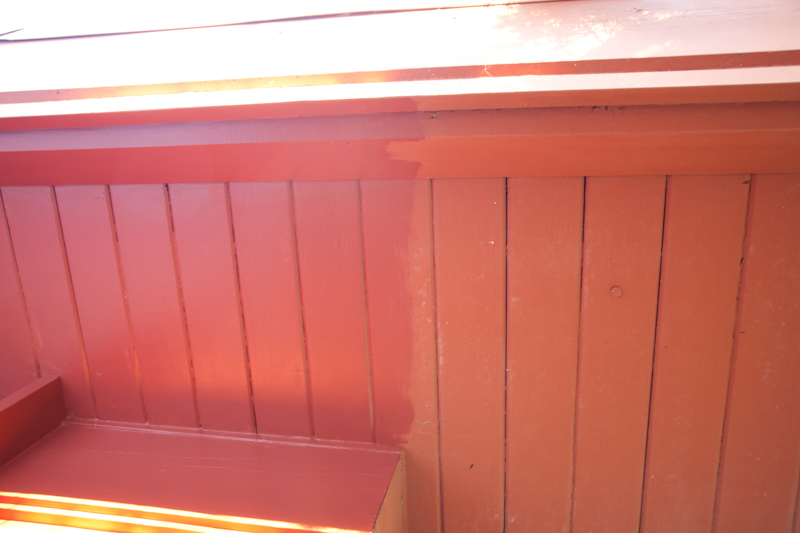 Painted to the edge of the window for now. | 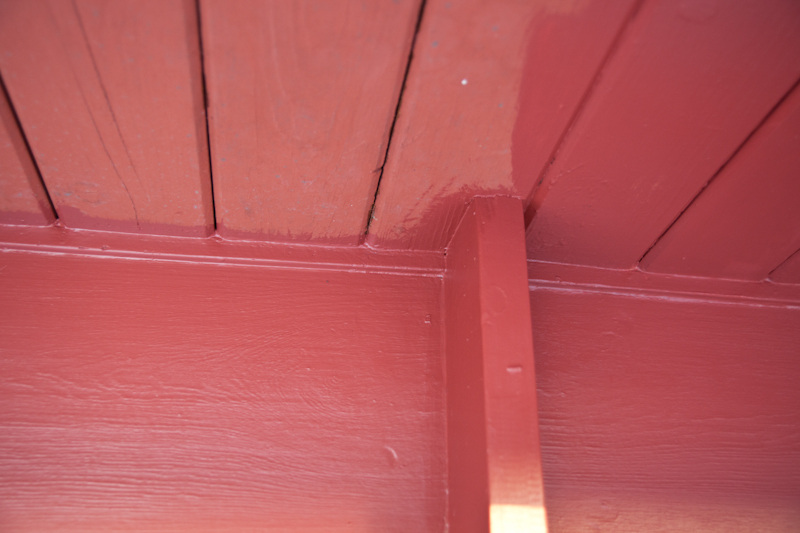 During Painting. looking good! |
 |  |
 Chimney area gets a coat too! |  |
Hopefully that will help up retain some heat! Then was the easy part, Painting! this was easy although I realized my whole house ,that is paintable, is basically trim pieces. The rest of the house will be in need of a repaint come summer, Stay posted for the expletives about that in the summer. This was a huge project that was really bugging me for a while once I learned how poorly it was sealed. This is one of those feel good improvements and hopefully it also eventually saves me a few dollars for upcoming projects.
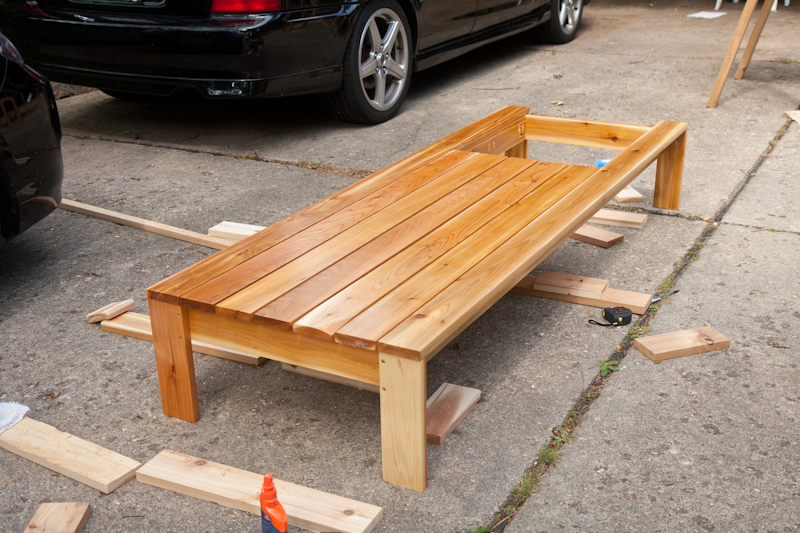
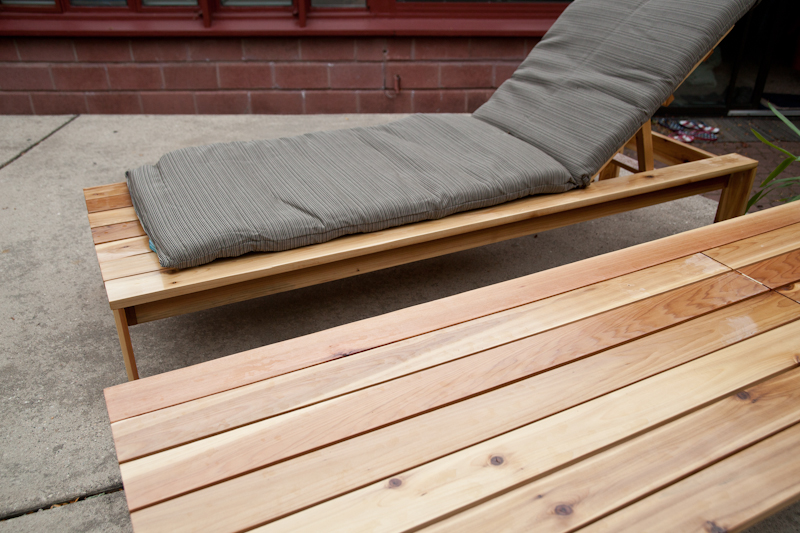
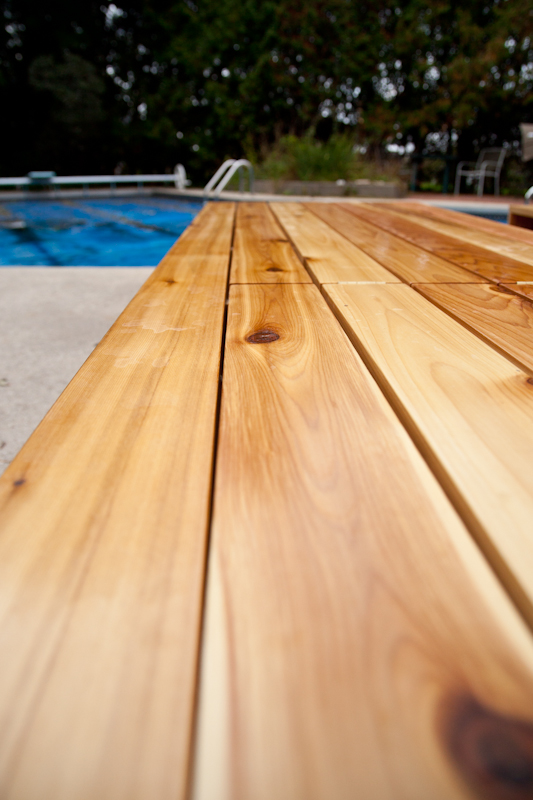
One of those such projects was building some lounge chairs for the pool area. I found some plans for a simple design modern chair. I modified them a little and built two of them. The plans area at Ana-White AKA Knock Off Wood in case anyone is interested. I used cedar and spent lots of time prepping the pieces. We cut everything first and then sanded and polyurethane everything before building them. After hours of sanding and finishing the pieces. Then I crossed my fingers that I have cut all the pieces correctly. I purchased a Kreg Jig and put it to good use on this project. The best thing is that there are no screws showing! All boards were put together and everything fit great! I even detailed the grain of the wood on all the top pieces to match from the bottom to the lounge back piece.
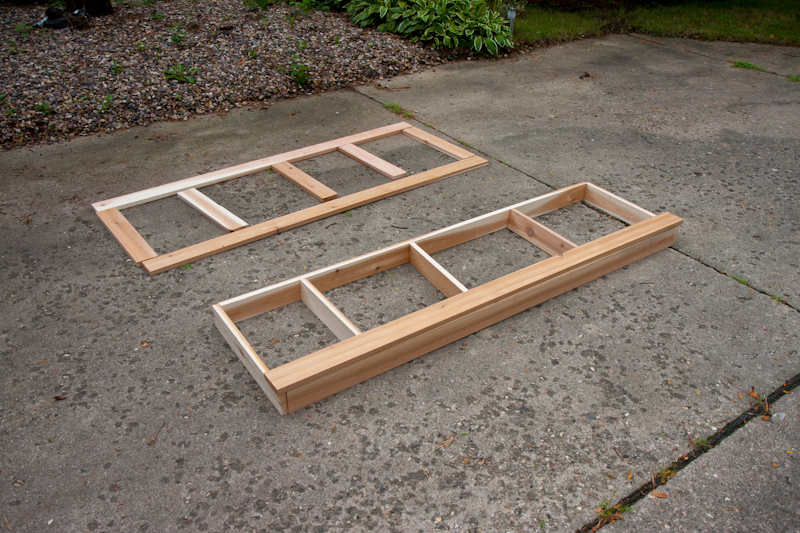 All pieces cut up and laid out. | 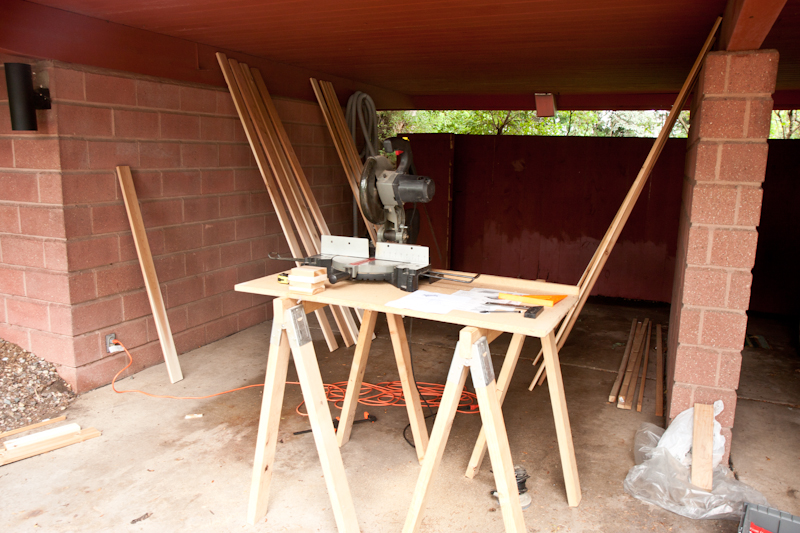 During Cutting |
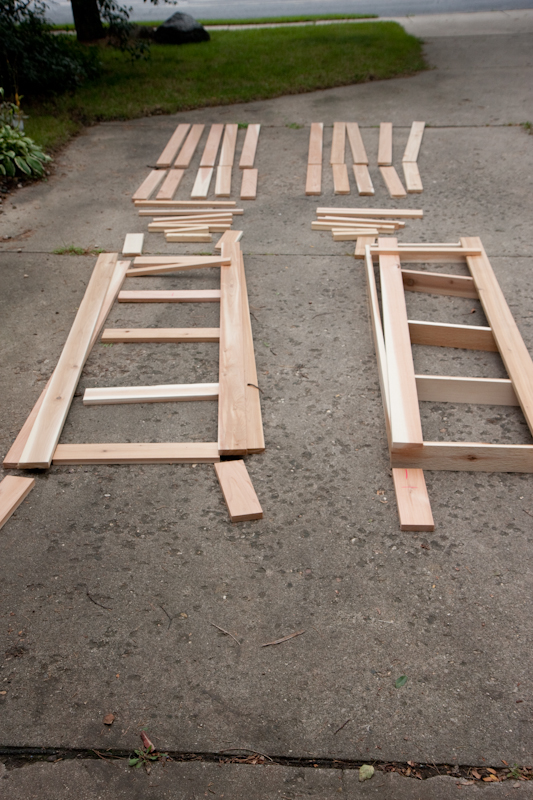 all done! |  After hours of sanding! |
 Pieces all preped for install. | 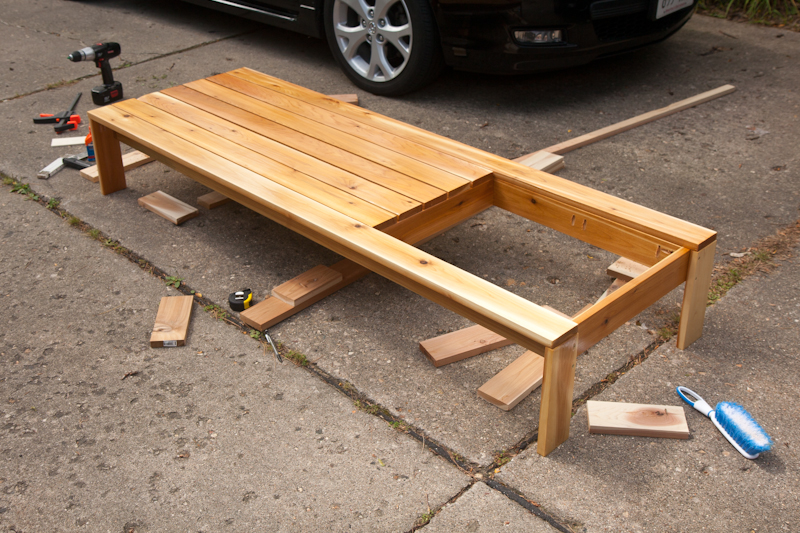 During Build |
 Looking good. | 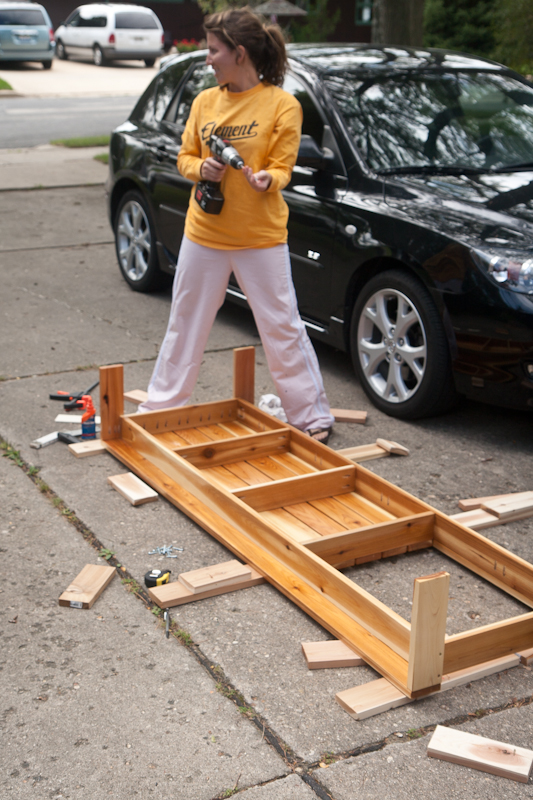 Dawn Running the show. |
They turned out great and much nicer than I thought. I'll be building other pieces of furniture to match next summer. I'm thinking a table, a few chairs, possibly a sectional, etc… These were made just in time for fall, When we are not using the pool anymore... but they will be used next season!
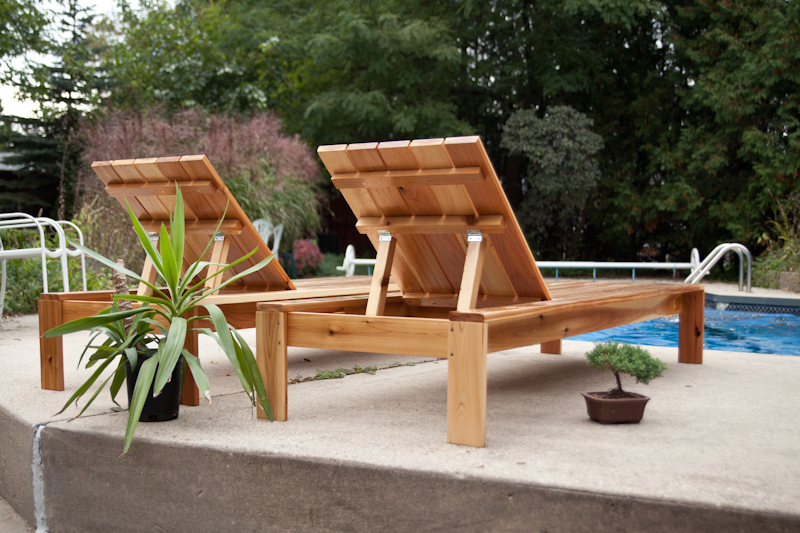 All done and poolside | 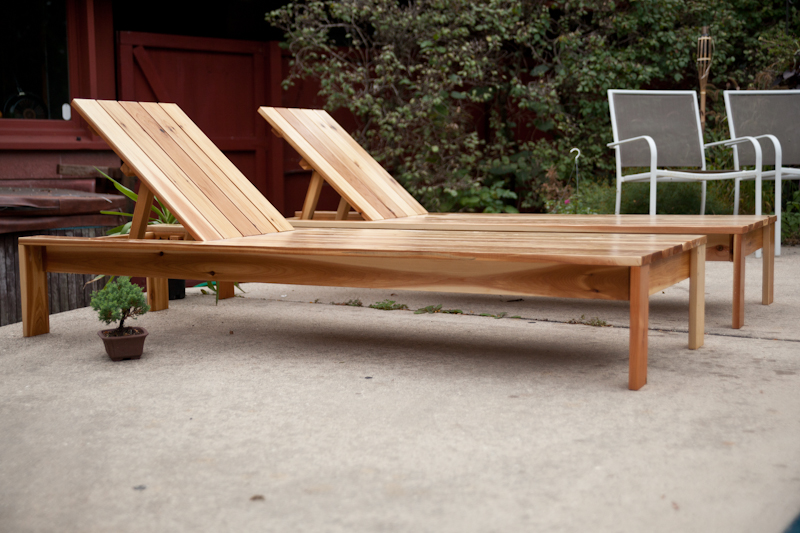 |
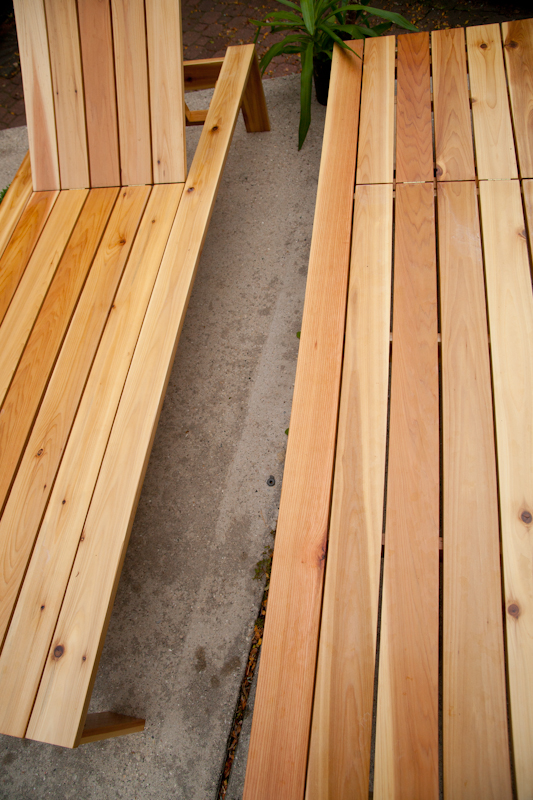 Pieces matched up | 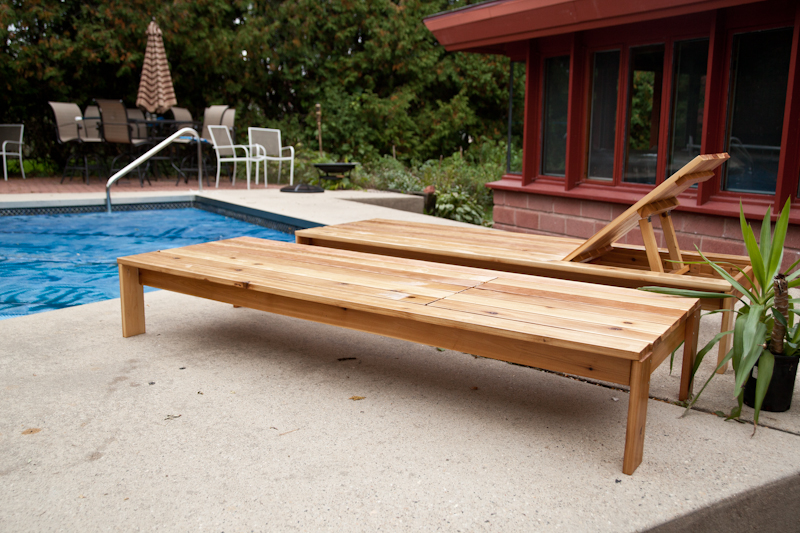 |
 One cushion added | 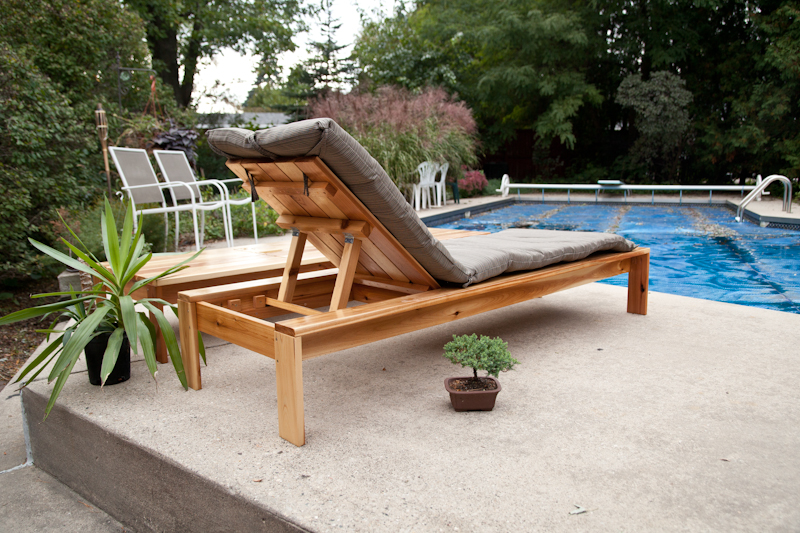 |
 |
Some of the smaller happenings:
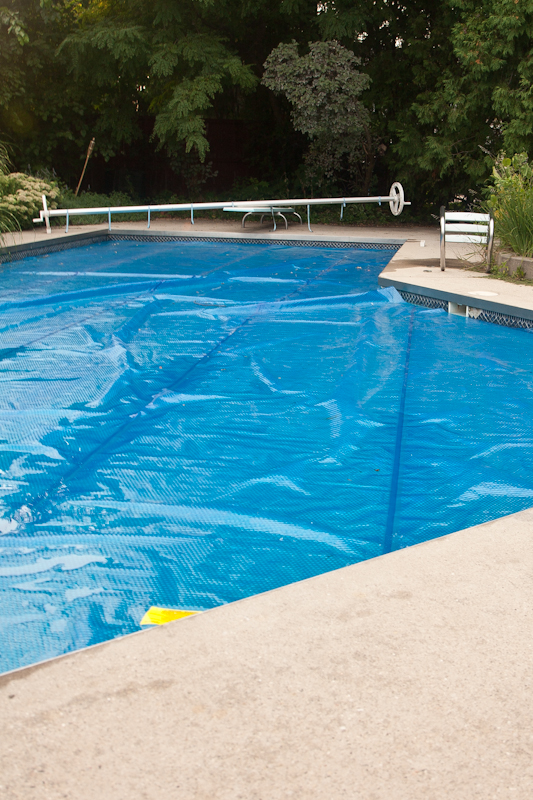
Another small to-do was trimming the solar pool cover to fit the pool. Claire cut the cover and it fits great! The winter cover was somehow fit into the miata and was taken to be fixed. Some holes were patched and a few straps were repaired.
 Cover cut up. | 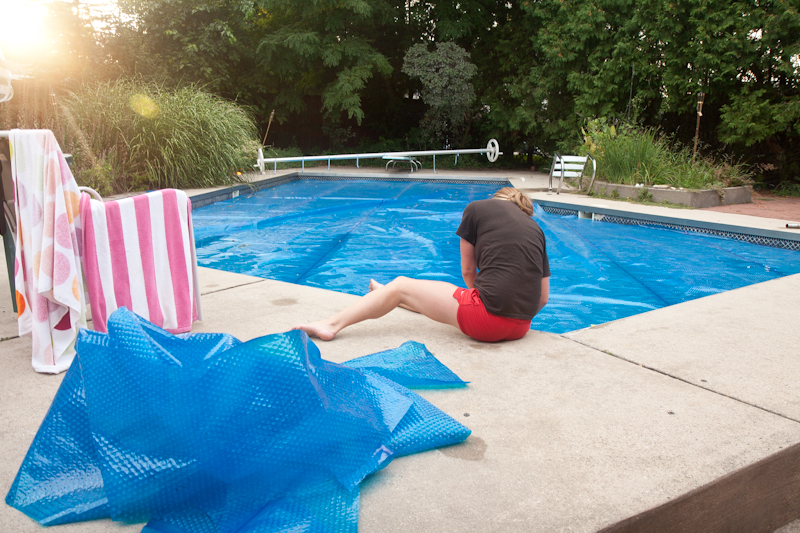 Claire doing the cut up. |
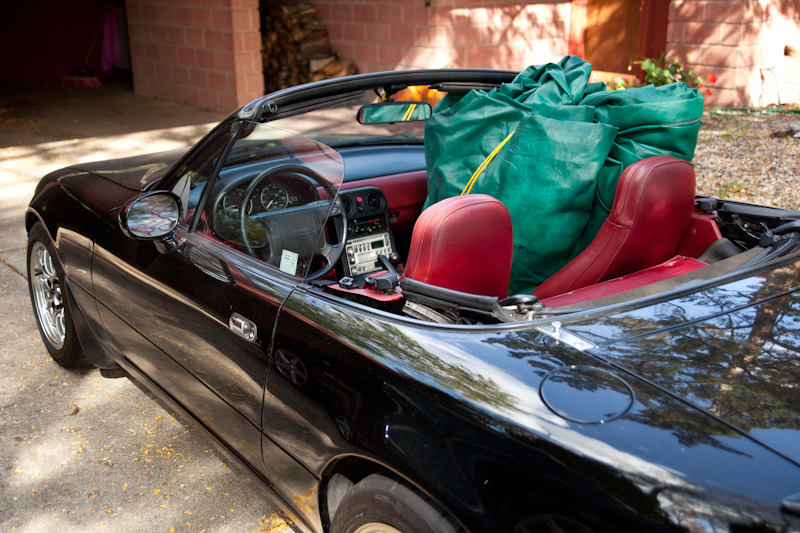 Somehow it's in the car! | 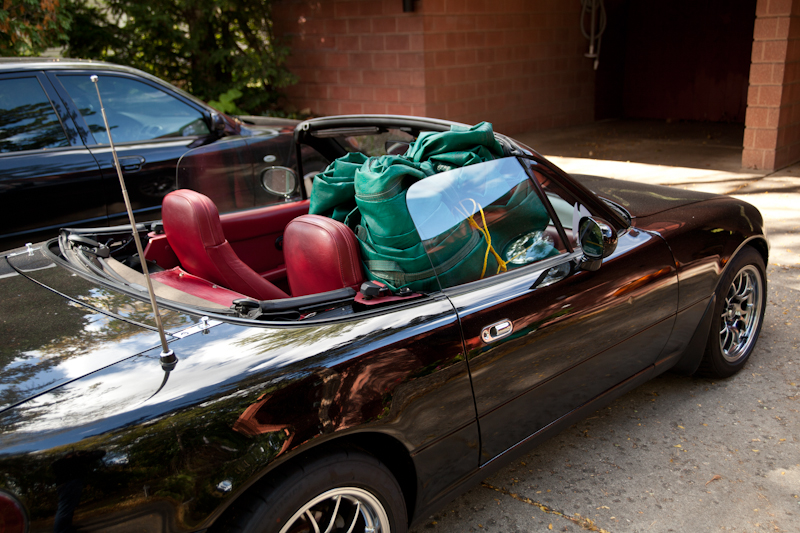 |
The fireplace has been repaired and cleaned and inspected for use! My good friend, Matt a brick mason, repaired the firebrick for me and got everything all fixed up.
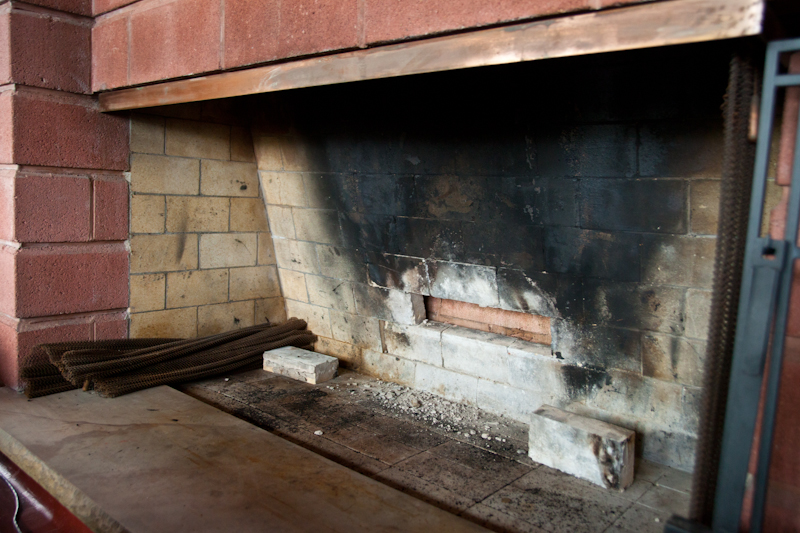 Bricks broken | 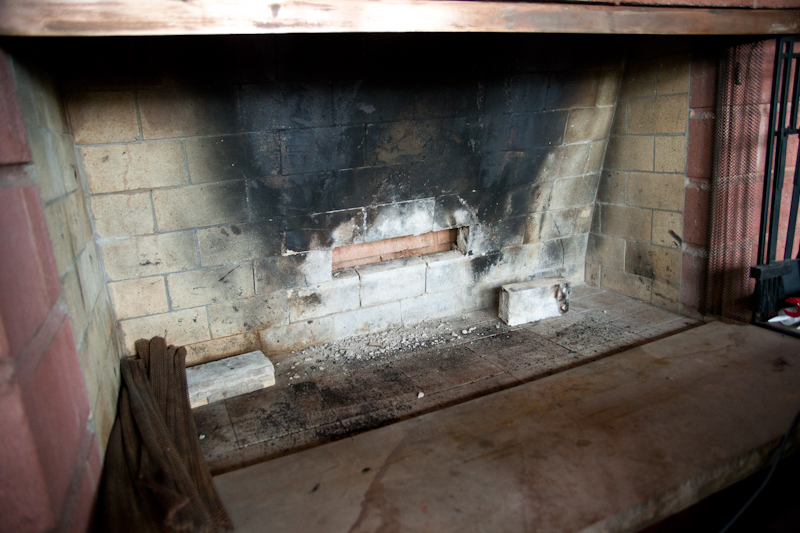 Before |
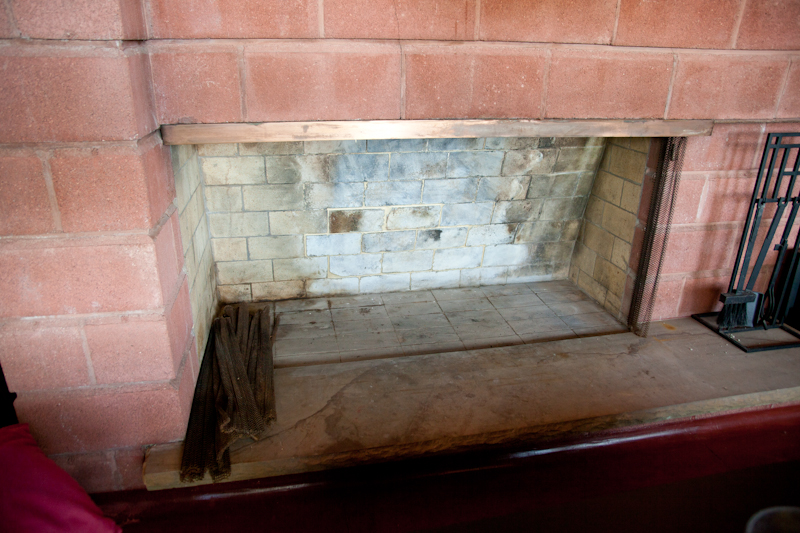 After all ready! |
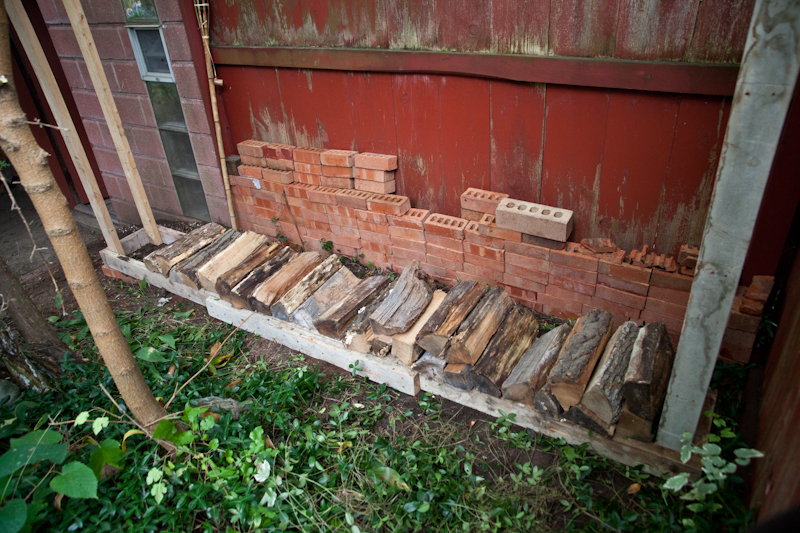
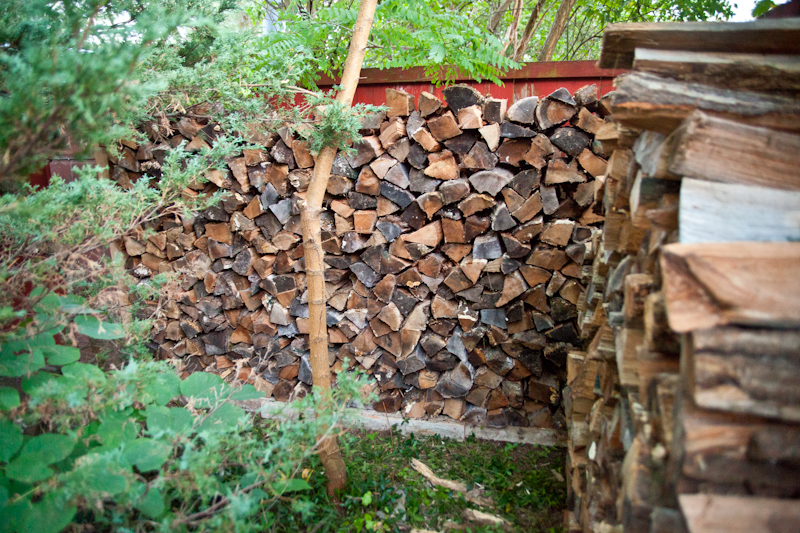
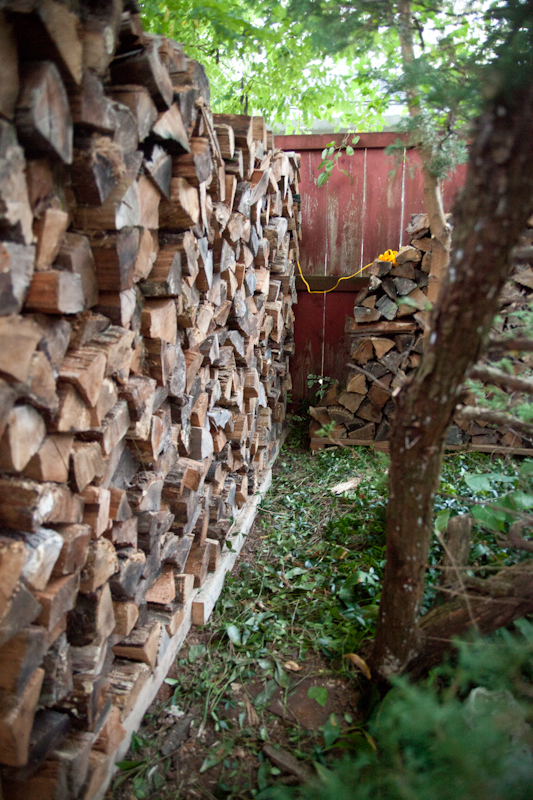
Being so we got a load of wood delivered to burn this winter. I decided to build a rack with some scrap pieces of wood I had lying around. I figured that everything would fit in the rack, Well I was wrong. We started staking on the rack and quickly realized that we had way more wood than we thought. After everything was stacked we ended up with a full rack, another pile and even a small stack in the carport. I cant wait to have a fire and use it!
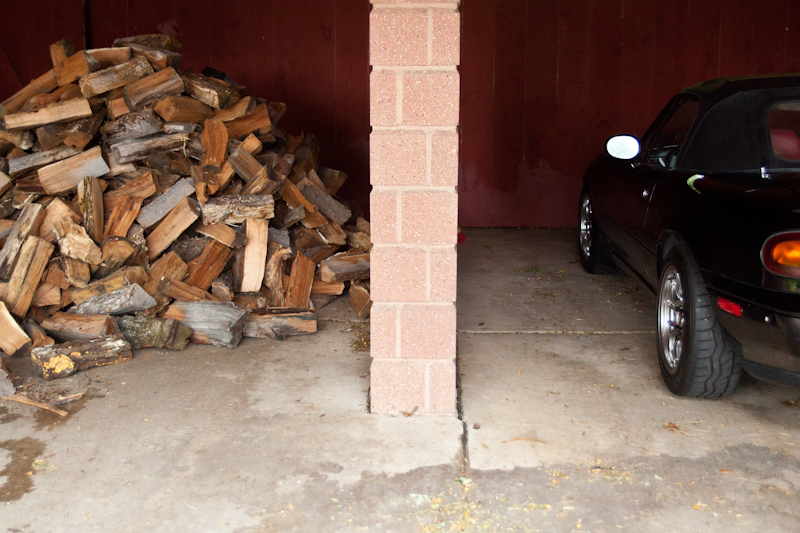 Piled up! | 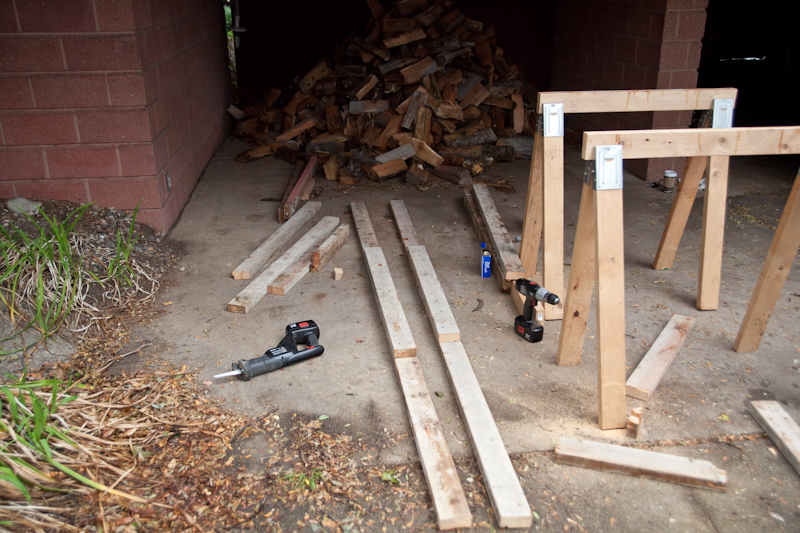 Building |
 Before | 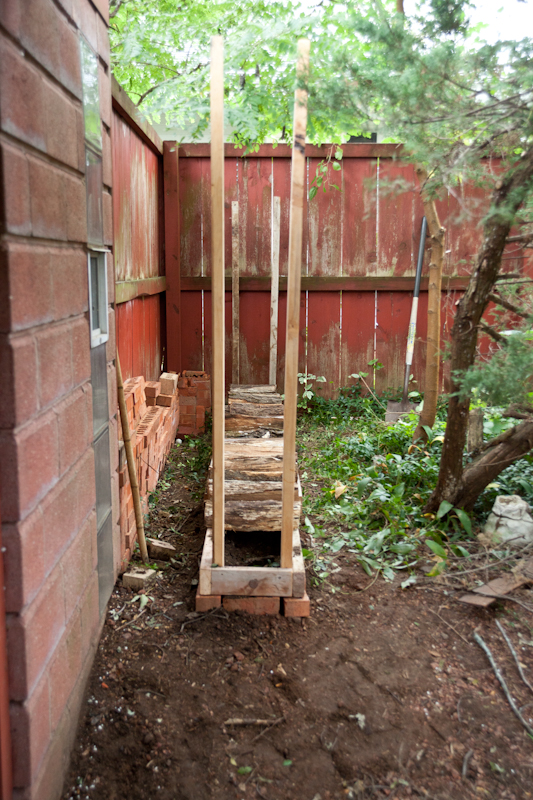 Rack built and placed |
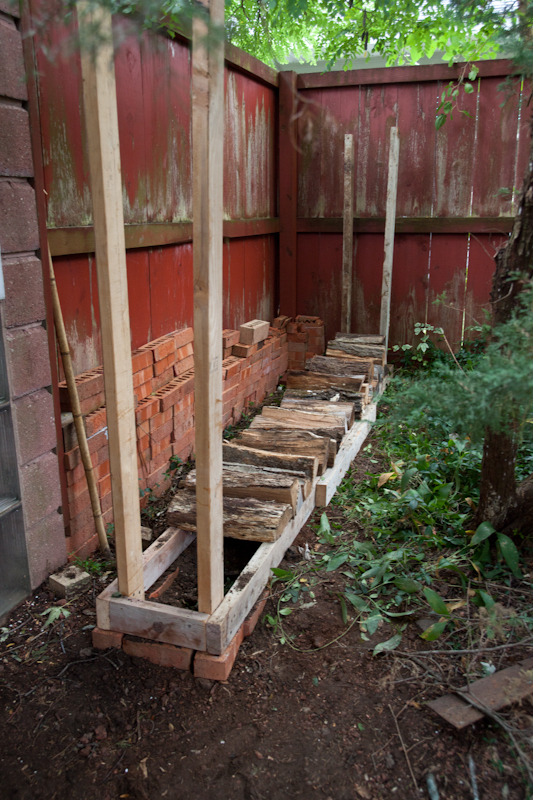 | 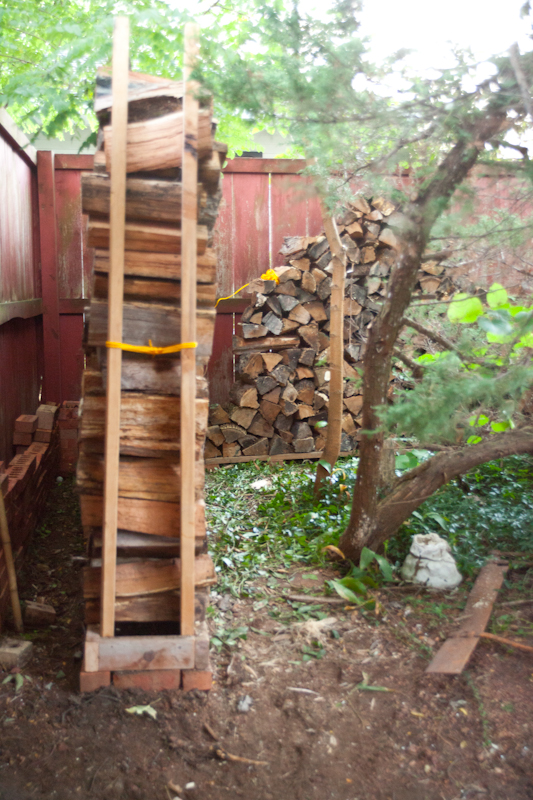 |
 |  All stacked up!!! |
 Lots of wood! | 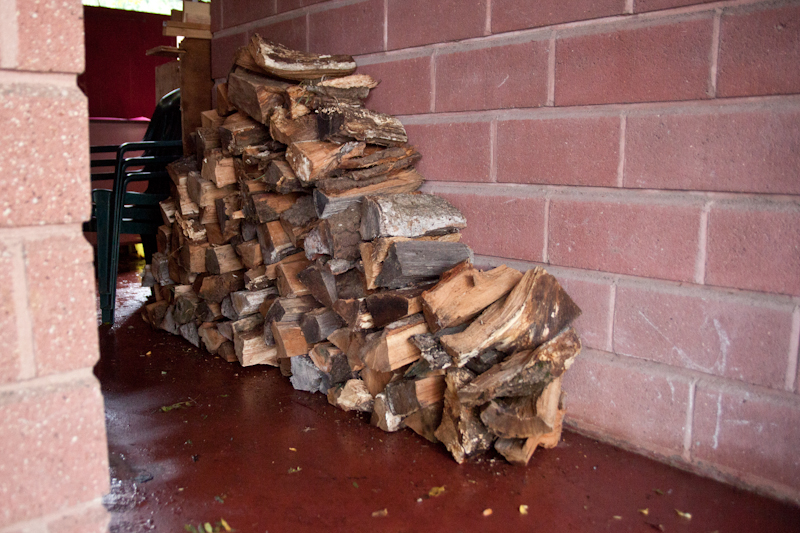 Third pile, lots of wood. |

I plan on using the fireplace quite a bit this winter but with a 60" damper were going to be losing lots of heat while the coals cool overnight. Being so I'm looking for ways yo minimize a draft while things cool. This unfortunately means some doors. I've been looking for a way to add some doors to help the efficiency and make it as less obvious as possible. I hate to do this to such a beautiful fireplace but it's going to make it much more usable for cold weather use. I've looked at a bunch of doors and I found some glass folding doors that I think I'm going to go with. They are made by a company called thermo-rite. I think that this is going to be the best option to make the fireplace more usable. If anyone has another ideas i'd love to hear them.
Here are just a few additional unrelated pics to share:
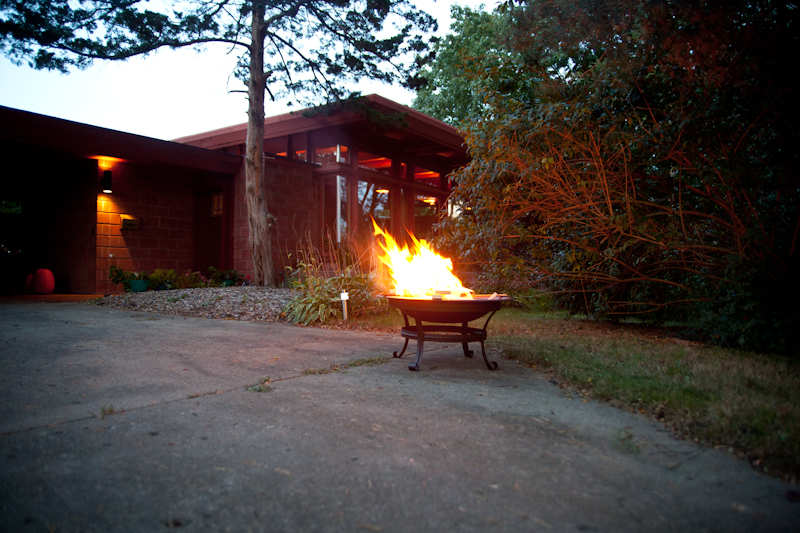 Fall Fire outside. | 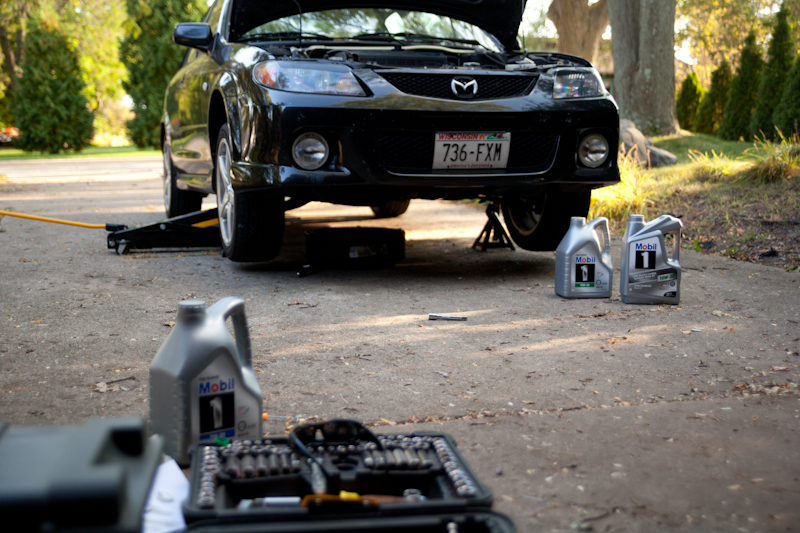 First auto repair done in driveway! |
That's all for the updates as of late.... were going to be working on finishing the kitchen before snow flies, so stay posted!
-IM
1 comment:
Love that you built anna's chaise lounges. I have been eying those for some time. I would really like them for our screen porch. maybe in the double. They turned out awesome! We have the same skylight's in the clear glass and I do like them. We have some trees that stretch above the house, so you can see the branches from inside. also at night the skylights up-light the trees if there are any lights on.
Post a Comment